Jekyll2026-08-09T03:05:47-05:00https://leecox.pro/feed.xmlLee CoxCloud migration, AI infrastructure, OS engineering, and the occasional dragon — from the workbench of a principal enterprise architect.Lee CoxThe factory tow hitch Tesla says doesn’t exist2026-08-09T00:05:00-05:002026-08-09T00:05:00-05:00https://leecox.pro/garage/the-factory-tow-hitch-tesla-says-doesnt-existThis one started at a Tesla service center in 2023, when I asked about
adding the factory tow package to my 2021 Model S and was told, in
person, that they had the parts and the procedure but hadn’t been given
clearance to install a hitch on the Model S. A year into it, a service
advisor gave me the blunter version, with a straight face: “Model S
doesn’t support a tow hitch.”
Which is interesting, because the Model S service manual contains the
retrofit instructions. The parts catalog contains the hitch. The SOP16
wiring schematics contain a complete trailer circuit. Europe gets the
hitch as an option. What Tesla means is “we’d rather not” — and
“we’d rather not” is not a wiring diagram. So began a quest that’s
coming up on three years, and since I documented the whole thing across a
long-running forum thread as it happened, this post is the assembled
story. Fair warning: there are part numbers ahead. That’s the good part.
The archaeology
The Model S left-hand body harness is the nervous system of the car’s
whole left side, and it’s where the factory tow wiring lives — when it
lives anywhere. Digging through the parts catalog turned up six harness
variants, and three of them carry the designation that matters: TW01,
the towing electrical connector in the SOP16 schematics.
Part
My read
2486394-00-C
HW3 harness, no tow
2486394-01-C
HW3 with TW01 — likely the Rev1 “two connector” tow wiring
2486394-71-C
HW3 with TW01 — likely the Rev2 “single connector” version
2486394-00-D / -01-D
The HW4 equivalents
3486394-01-B
The Plaid harness, no tie-breaker listed
Rev1 versus Rev2 matters: Tesla changed the hitch’s electrical interface
mid-life. The service documentation spells it out once you know to look —
hitch part numbers J and above are Rev2; H and below are Rev1. If you
ever buy one of these off eBay, ignore the model year in the listing and
read the suffix. That one sentence has already saved at least one person
I’ve corresponded with from buying the wrong revision.
The part that ships but doesn’t exist
Armed with the numbers, I did the obvious thing: ordered both HW3 TW01
harnesses and let Tesla’s parts system tell me the truth.
The -71-C never shipped. Months of waiting, then nothing. The
-01-C did ship — six months of waiting, and when I opened the box,
it was a -00-C wearing a -01-C label. The tow wiring and connectors
simply weren’t in it. My best guess: there was a plan to support harness
retrofits, somebody killed it late, and the part numbers survived while
the actual copper didn’t. At this point my standing advice is blunt:
if you want the factory tow harness, you’re pulling it off a wreck.
Unicorn hunting
Here’s where it gets fun. While chasing paperwork, I found evidence that
some cars left the factory with the tow wiring installed — an early
Plaid whose owner needed nothing but the Rev1 hitch itself, bolt-on and
program. There appear to be more unicorns out there in North America.
The five-minute check if you own a Palladium S: pop the driver’s sill
trim and look in the bottom front corner, next to the left-hand body
controller. If there’s a trailer-brake-controller plug and wiring
sitting there unused, congratulations — you’re holding a winning lottery
ticket Tesla never told you about.
And the software side confirms the car is willing: I set the trailer
configuration on my own 2021 LR through a Toolbox session. No errors.
The car knows how to tow. It’s the copper that’s missing.
The build
So: no orderable harness, a proprietary Tesla-specific controller
connector on the S/X side that’s very hard to order (I never found a
source), and a car that’s software-ready.
The engineering answer is a hybrid jumper harness, and the unlock
came from the Model Y parts bin: the HW4 Model Y uses the same hitch
controller with a different Molex connector at the trunk, served by a
cheap sub-harness (a $50 part) that carries the controller connectors
and the hitch connector. Graft that Y sub-harness onto Model S/X Rev2
controller wiring, follow the pin/terminal/wire-size documentation that
exists on both sides of the graft, and you have a factory-electrics tow
installation Tesla never sold you.
It’s slow going (this is the kind of project where a connector spends
weeks on a boat), and it’s probably a 1:1 solution rather than
something repeatable. But I think it’s fun, and the documentation trail
means the next person starts from mile 20 instead of mile zero.
A few hard-won practicals if you attempt any version of this: the
service center will let you order hitch parts but won’t install
them (“Model S doesn’t support a tow hitch,” remember), and they won’t
put an X-specific part on an S even where the part itself lists Model S
specs. If you go the simpler taillight-signal route instead, run your
connections through the boot at the right-hand lower storage area —
untape the boot from the harness, fish the wires, retape. Cleanest
installation you’ll get. And ship hitches with the controller, wiring,
and 7-pin receptacle removed and packed separately — I’ve had to send
one back because the shipping weight beat the attached parts to death.
Why bother?
Somewhere in year two, a reasonable person asks: for towing a small
trailer, why not just buy the perfectly good third-party hitch? For most
people that’s honestly the right answer. What’s on my car today is the
factory hitch itself, installed but not yet wired (controller taped off,
waiting on the harness). But “the factory did it this way, therefore it
can be done this way” is a hill I’ve been climbing since I was flashing
AS-BUILT data into Fords (that’s its own story),
and there’s a real difference between bolting an accessory onto the car
and putting back what the factory designed in. I want the second one.
The car supports a tow hitch. It says so right there in the manual
nobody at the counter has read.
Thanks for reading!
]]>Lee CoxThe accidental parts supplier2026-08-08T10:00:00-05:002026-08-08T10:00:00-05:00https://leecox.pro/garage/the-accidental-parts-supplierNobody sets out to become a parts supplier from their garage. It happens
one step at a time. You do a retrofit on your own car, you solve a
connector problem the factory never intended you to solve, someone on
the forum asks “hey, can you make me one of those?” — and eighteen
months later you’re de-pinning connectors at the kitchen table wondering
where the evenings go.
This is the story of how the Matrix headlight retrofit
turned me into a very small, very accidental parts vendor, and what
running even a tiny hardware operation teaches you.
It starts with an unobtainable connector
The retrofit itself is straightforward in principle: the newer Matrix
headlights use a different connector than the older cars, so you either
splice the factory harness (reversible: no; warranty-friendly: also no)
or you build an adapter that sits between the car and the light. The
adapter is clearly the right answer. The problem is that you cannot walk
into a store and buy the connectors it needs.
The workaround came from an unlikely donor: eBay is full of headlight
pigtails for other European cars (Audi, VW, even Porsche Cayenne
harnesses) that carry the right connector families. Buy the donor
pigtail, de-pin the connectors you don’t need, cut back the opposite
end, and crimp up the adapter you actually want. With a proper crimp
tool and a set of de-pinning tools it takes about an hour per set. The
first one I built was for my own car. The second one was for a forum
member who asked nicely. You can guess how it went from there.
What quality control means at kitchen-table scale
Making the same part more than a handful of times teaches you things
the first build never does. The lesson I’d pass along to anyone doing
small-batch automotive parts: the failure modes live in the tolerances
between manufacturers. The connectors have small alignment tabs inside
(four of them, purple and pink), and because the aftermarket shells and
the factory shells come from different molds, those tabs can catch and
keep a connector from fully seating. They cause nothing but problems,
so now they come out of every set I make before it ships. That’s the
kind of thing you only learn by being the person people come back to
when it doesn’t click home.
And they do come back, which brings me to the day a customer sent me a
photo of his adapter and the wire colors were backwards. (The three-pin
end has an order — red, blue, black — and this one read like it had been
assembled in a mirror.) There’s only one right answer in that moment,
and I gave it: if that set is mine, I’ll tell you how to fix it in five
minutes, and I’ll refund you or overnight you a new one — your choice.
Standing behind the work is the entire difference between “guy who sells
adapters” and “guy you’d let near your car.” It costs a set of parts
now and then. It’s worth it.
The group buy, or: economics on a slow boat
The other way you accidentally become a supplier is the group buy. For
the RGB ambient lighting project, the kits come from overseas, minimums
apply, and somebody has to be the person who fronts the order and
distributes the parts. That somebody learns two things. First, the boat
is slow: the original order took more than six months to arrive, which
is a long time to hold other people’s enthusiasm (and money) in a
cardboard box by the door. Second, demand is a spike, not a line: the
day a popular video about the mod dropped, every spare kit I had left
sold out at once.
These days, when someone asks, I mostly point them to the established
vendors (EVOffer, EVMod — as a fellow forum member put it, it’s all the
same kit). That isn’t me being coy about competition. It’s the honest
math: a vendor with inventory serves people better than a guy with a
group buy that lands in Q3, and the low-hundreds of cars that have done
these conversions deserve a supply chain sturdier than my kitchen
table.
Why stay tiny, then?
So why keep making adapter sets at all? Partly because some corners of
these retrofits are still too niche for any real vendor to bother with.
Partly because being hands-in-the-connectors is how I stay current on
the platform (the parts knowledge in the tow hitch quest
came directly from this bench time). And partly, honestly, because
there’s a specific satisfaction in a stranger in another state turning
on headlights that work because of something you crimped correctly.
It’s the same reason I answer the DMs, and occasionally spend a Saturday
helping a local owner with an install: the forum gave me the retrofit
in the first place. Making a few parts is how I pay the toll.
Next up from the garage, sooner or later: the media-converter rental
economy (return it on time, or the $75 rental stops being $75), and
what “programming” actually means when the part finally clicks in.
Thanks for reading!
]]>Lee CoxSixteen years of asking cars to do things they weren’t ordered with2026-08-07T10:00:00-05:002026-08-07T10:00:00-05:00https://leecox.pro/garage/asking-cars-to-do-things-they-werent-ordered-withEvery car I’ve owned has eventually faced the same question: what else
were you built to do? Not modified in the fast-and-loud sense (I’ve
never cut a spring or glued on a wing). I mean the quieter obsession:
the factory designed this platform to support features my particular
car didn’t ship with, the wiring or the software or the mounting points
are often still there, and somewhere in a service document is the proof.
The build sheet records a purchase decision somebody made at a
dealership years ago. It doesn’t have to be the last word on what the
car can do.
This is the origin-story post for the Garage section, because the
current project (a factory tow hitch Tesla insists doesn’t exist — that
story is coming in its own post),
makes more sense once you know it’s the third generation of the same
instinct.
2010: the F250 navigation unit
It started with a 2010 Ford Escape XLT and a navigation head unit pulled
from a 2009 F250. Same corporate parts bin, very different
window stickers. The physical part of the swap only takes a Saturday.
The electrical part was the real project, because the truck radio and
the little SUV had never been introduced to each other.
The key was Ford’s AS-BUILT data (the per-vehicle configuration
record that tells every module what the car is and what it’s allowed to
do). Load the AS-BUILT values from a donor vehicle whose build did
include the feature, and the electronics stop arguing. I fed my Escape
a section of a 2010 Escape Limited’s configuration, and the nav unit
woke up believing it had always lived there. Drop it in reverse and the
camera screen came up, ready and waiting — for a camera I hadn’t
actually wired in yet. The pigtails and the custom wiring came later,
but as far as the modules were concerned, that camera had been ticked
at the factory.
That swap taught me the foundational lesson of all of this: modern
vehicle features are parts + wiring + configuration, and the
configuration is just data. Data can be read, understood, and (done
carefully, with the service documentation open) rewritten.
2013: the tow package that Lincoln forgot
Next platform, same move, more copper. The 2010 Lincoln MKT EcoBoost
(my beloved black-on-black sleeper) shares its bones with the Ford Flex,
and the platform supported a factory tow package mine didn’t ship with.
So it gained one: the real thing, factory parts, factory routing,
documented on the owner forums as I went. Along the way that car turned
into a rolling seminar on the rest of the discipline: talking other
owners through retraining the collision-warning sensor after bodywork,
EcoBoost charge-air plumbing, and the eternal truth that the parts
catalog knows more than the sales brochure ever admitted.
The MKT era added the second lesson: the factory’s own engineering is
usually the best aftermarket kit you can buy. It fits, it lasts, and
the documentation (diagrams, torque specs, connector part numbers)
already exists. You just have to be willing to read like it’s your job.
2022: feature flags on wheels
Then came a 2021 Model S. Does a Tesla even have an AS-BUILT record?
The short answer is no, not in the Ford sense. What it has is a
gateway config: a file of feature flags living in the gateway
controller inside the MCU, telling the car’s software what hardware it
believes it has. Change the config (through Tesla’s own Toolbox, these
days with a paid day pass), redeploy, and capabilities appear exactly
the way my Escape’s camera screen did sixteen years ago.
The architecture is genuinely elegant (zonal controllers, smart
devices on LIN and CAN buses, one config to rule them), and it’s made
possible things the Ford era couldn’t dream of: matrix headlights on a
car sold with the lesser lights, a passenger-lumbar retrofit done over
a weekend on my wife’s Model Y, tail lamps from a later revision, the
tow-hitch project. The instinct is unchanged. The difference is the
posture of the manufacturer: Ford published AS-BUILT structure openly
enough that a guy with a laptop could learn it in 2010. Tesla treats
the equivalent layer as theirs, on a car I own (an approach I once
described on a forum as very Apple, and I didn’t mean it entirely as a
compliment). The capability being in there, behind a flag I’m not
supposed to flip, changes the project: the engineering is still the
engineering, but now there’s a negotiation with the manufacturer
sitting on top of it.
What sixteen years of this actually teaches
Read the service documentation first, opinions second. Every one of
these projects began in a wiring diagram or a parts catalog, not a
YouTube thumbnail. The documents don’t care what the counter says is
possible.
The gap between trims is where the fun lives. Manufacturers build
one platform and sell it as five cars. The wiring for the car you
didn’t buy is frequently sleeping in the car you did.
Configuration is the modern crowbar. In 2010 it was AS-BUILT hex
values. In 2026 it’s gateway feature flags. In both cases, the
difference between “your car can’t do that” and a working feature was
never metal — it was a few bytes of permission.
And know when you’re done. Not every gap is worth closing; some
retrofits turn out to be a lot bigger than they look on paper, and the
fog-light adapter that once cost me a tow truck (a story for another
post) taught me the price of forgetting that. The discipline isn’t
doing everything; it’s knowing what the platform supports, and
choosing.
The Garage section will mostly be these stories: current Tesla
projects, the occasional MKT flashback, and the tooling that makes it
all go. If your car’s build sheet has ever felt like a suggestion,
you’re among friends here.
Thanks for reading!
]]>Lee CoxI audited my backlog with 13 AI agents (and deleted a quarter of it)2026-08-05T10:00:00-05:002026-08-05T10:00:00-05:00https://leecox.pro/ai-engineering/i-audited-my-backlog-with-13-ai-agentsEvery project of any age carries a backlog that is part roadmap, part
archaeology. Items written by past-you, for reasons past-you understood,
in a codebase that has since moved on. You know some of it is stale.
You also know that verifying a couple hundred items by hand is a full week
of unglamorous work, which is why nobody ever does it.
This is a story about doing it anyway. It took an afternoon and a raid
group of 13 AI agents.
The setup
My current OS side project had accumulated just over 200 backlog items
across several documents. Some
dated back to the first week of design. The codebase had been through a
compositor rewrite and a licensing cleanup since. I no longer trusted the
list, and an untrusted backlog is worse than no backlog, because you stop
reading it.
So I gave an agentic coding tool a job description instead of a task list:
take every item, go read the actual repository, and classify it. Is this
done (the code exists and works)? Stale (the premise no longer
exists)? Still real (verified gap)? Each agent took a slice, and each
had to cite the files it checked. No citations, no verdict.
The part that matters: adversarial verification
Here’s the thing I’d tell any engineering leader looking at agentic
workflows: the first pass is not the product. The first pass is a
hypothesis. Language models behave like enthusiastic interns. They work
fast and they never get tired, but every so often one of them is
confidently wrong about something important.
So the second pass was a different set of agents whose only job was to
attack the first set’s conclusions. Take a “this is done” verdict and try
to prove it wrong. Take a “stale” classification and check whether the
premise actually still exists under a renamed identifier. The adversarial
pass caught real misses — including items marked done where the code
existed but the verification didn’t, which in my shop means it isn’t
done.
The results
53 items were stale-done (marked done or claimed complete, but no
longer matching reality). A quarter of the backlog was noise.
The survivors got reorganized into a short Now queue (25 items),
a Deferred pile, and (my favorite artifact) a not-doing.md file that
records what I’ve decided not to build and why. Decisions rot slower
when you write down the reasoning.
Total wall-clock time: an afternoon, most of it me reviewing verdicts
rather than producing them.
What I actually learned
The short answer is: agents didn’t replace my judgment; they changed
where I spend it. I went from producing claims (“is this done?”) to
reviewing them — and reviewing is where a couple decades of scar tissue
actually pays off.
The long answer has a rule in it, and the rule is the whole post:
never accept an agent’s claim that isn’t verifiable against the tree.
Citations or it didn’t happen. The same discipline I’d apply to a vendor’s
migration assessment applies to an AI’s backlog audit: an assessment earns
my trust when I can check it against the tree myself, no matter how
confident it sounds.
More in this series soon: the CI gates that keep AI-written code honest,
and what “proven fail-then-pass” means when the intern types faster than
you can read.
Thanks for reading!
]]>Lee CoxThe job search runs on agents so I don’t have to2026-08-01T10:00:00-05:002026-08-01T10:00:00-05:00https://leecox.pro/career/the-job-search-runs-on-agentsMicrosoft cut our entire Infrastructure GBB organization in early July
(the longer story). Within a week, every
well-meaning person in my life had told me the
same thing: “job searching is a full-time job.” And they’re right, but
nobody ever asks which parts of that job actually deserve full-time
attention. Most of a modern job search is mechanical: tailoring documents,
formatting, tracking, drafting yet another polite follow-up. Mechanical
work is what I have agents for. So the first thing I built after the
layoff wasn’t a spreadsheet of openings. It was a harness.
Same deal as the home lab:
this post is the setup (the harness, the agents, the process, and what
it’s produced) and then the actual point, which is what all of it buys.
The harness
The search lives in a project directory that’s structured like an
engineering repo, because it is one: resumes, cover letters,
correspondence, imported conversations, and a build pipeline. The agent
works inside it with full context; nothing lives in my head or a random
Downloads folder.
Resume-as-code. There’s one archetype resume (the maintained,
canonical account of the career) and it never ships. What ships is a
build: a Node pipeline using the docx library that produces a tailored
Word document and PDF per application. Formatting bugs got fixed once, in
code. When a posting demands a different emphasis, the delta is a
tailoring pass, not an hour of fighting Word’s list indentation at
midnight.
A fact base with usage rules. Underneath everything sits a performance
record (every deal, metric, and win from the career, compiled once and
kept internal) with hard rules the agents must draft against: numbers
come only from the record, opportunities are never written as bookings,
losses are stated as pursuits, customer names stay generalized unless
there’s a release. In other words: the resume can’t inflate, because the
data layer refuses. I’d love to claim this was a character decision, but
honestly it’s just good engineering (the same reason you validate at the
schema and not in the UI).
A voice profile. The strangest and most valuable piece. The agents
draft correspondence in my voice, trained not on vibes but on my actual
sent mail, and refined the way you’d tune any model: by diffing what the
agent drafted against what I actually sent, and folding every correction
back into the profile. It has learned things about my writing I hadn’t
noticed myself: that I thank people for specific things rather than in
general, that I’d rather hand someone a menu of options than an
open-ended ask. The drafts land close enough now that my edit pass is
minutes.
The process
The loop per application is boring, which (like the lab) is the point:
Intake: posting comes in; an agent maps its language against the
record. Where there’s a truthful match, the resume mirrors the
posting’s exact terms. Where there isn’t, it doesn’t (see rules above).
Build: tailored resume and cover letter compile out of the
pipeline. I review a diff, not a document.
Correspond: replies, scheduling notes, thank-yous, warm-network
messages get drafted in-voice with the full thread as context. I
send everything myself. The agent has no send button, and it never
will — the harness stops at the edge of every relationship.
Track: state lives in the repo. “Where are we with X?” is a
question the directory can answer.
The Self-JD: scoring the search in both directions
The piece of the harness I’d recommend even to someone who automates
nothing else: before I applied to a single posting, I wrote the job
description for the role I would post for myself. Scope, altitude,
domain, the customer-facing/engineering mix, location and travel shape,
and the markers of the places I’ve done my best work. It forces the
“what do I actually want” conversation out of your head and into a
document that can be argued with.
Then it becomes a scoring system, and the weighting is where most people
(me included, first pass) get it wrong. The temptation is to weight the
shiny factors (brand, title, the comp headline). The fix is evidence:
go back through your own history, role by role, and ask what actually
correlated with thriving versus what correlated with leaving. Those
factors get the heavy weights. My own record says autonomy and problem
quality predicted every good year I’ve had, and title predicted nothing;
the weights now reflect that, whatever the shiny part of my brain thinks
on a given Tuesday.
Every posting that comes in gets scored two directions:
The role against my Self-JD: weighted fit, does this deserve
pipeline space at all. A posting that can’t clear the bar doesn’t get
a tailored resume, however good the note that came with it felt to read.
Me against the role: requirement by requirement. And here’s the
rule that makes it worth doing: every claim needs a receipt from the
record. “I can do this” doesn’t score; “I did this, here, with this
outcome” scores. The same discipline as everything else in the
harness, and it cuts both ways. It catches the
impostor reflex that undersells real evidence, and it catches the
stretch fantasy where I talk myself into a fit that’s really three
gaps in a trench coat. What’s left is an honest gap list, which is
exactly the interview-prep syllabus and the cover letter’s talking
points.
And it’s a living system: refinement and rescoring. After every
conversation and every loop, what I learned goes back in: a weight was
wrong, a requirement on paper turned out not to matter in the room, a
“dream fit” revealed a travel load the posting never mentioned. The
agents rerun the scoring across the whole pipeline, and the ranking
reshuffles without sentiment. Sunk cost doesn’t get a vote; the
month-old conversation gets rescored like it walked in today.
The outcomes
The honest scorecard, a month in: the mechanical layer of an application
(the part that used to eat an evening per posting) now takes minutes of my
attention. The documents going out are fact-checked to a standard no tired
human at 11 PM holds himself to: nothing ships that the record can’t back.
And the pipeline is doing what a pipeline should: several active
conversations running, interview loops in motion. No outcomes to announce
yet; when there’s one, this thread will hear about it.
The actual point
Here’s the thing the harness is really for, and it isn’t efficiency for
its own sake. Everything above exists to protect the hours that matter,
because the parts of a job search that produce a job were never the
documents:
Networking. Every conversation that has moved my search forward has
come through an actual person rather than a portal. The harness means
that when someone offers me twenty minutes, my prep is done and my
follow-up is thoughtful and same-day; the machine handles the ceremony
so I can show up prepared and actually present.
Interview prep. Loops at the principal level are won in the room.
The reclaimed evenings go to the actual work: systems thinking, stories
with numbers I can defend, whiteboards.
Self-reflection. The least automatable task on the list: figuring out
what the next decade should actually be, rather than sprinting into the
first thing that looks like the last thing. The Self-JD is where that
thinking gets written down, but the thinking itself happens on long
walks, away from any terminal. A layoff hands you a rare, unwelcome gift
(a forced pause with real stakes), and it would be a waste to spend it
fighting Word.
That’s the design, then: the agents handle the search’s mechanics, and
the human parts stay human. If you’re in the same boat (and this
industry has put a lot of good people in this boat lately), build the
harness once, and then go spend yourself where it counts.
Thanks for reading!
]]>Lee CoxThe VMware bill came due. Now what?2026-07-26T10:00:00-05:002026-07-26T10:00:00-05:00https://leecox.pro/migration/the-vmware-bill-came-dueIf you run enterprise infrastructure, you’ve either had this meeting or
you’re scheduled for it: the virtualization renewal comes in, the number
has grown a multiple, the licensing model has changed shape, and somebody
upstairs wants a plan on their desk by Friday.
I’ve spent the last several years of my career in exactly these meetings
(across Retail, Manufacturing, Healthcare, and Financial Services), and the
first thing I tell every team is the same: you have more options than you
think, but you don’t have forever to pick one. The second thing I tell them
is that panic-migrating everything is how you turn a licensing problem into
an outage problem.
So what do you actually tell the person who wants the plan by Friday? It’s
a fair question.
The actual decision tree
Every estate is different, but the branches are not. There are four, and
you’ll probably use more than one of them.
Option 1: Pay, and buy time deliberately.
Sometimes the right answer for this renewal is to pay — but pay for a
shorter term than procurement wants, and spend that term executing one of
the other options. The mistake isn’t renewing; it’s renewing for three
years and then doing nothing for two and a half of them. If you take this
branch, the renewal is the deadline for the rest of the plan.
Option 2: Swap the hypervisor, keep the datacenter.
Hyper-V, Proxmox, Nutanix, OpenShift Virtualization — the field is real
and I’ve seen each of them hold production weight. The honest trade-off:
you’re re-training your ops team and re-plumbing your backup, DR, and
monitoring stack no matter which one you pick. The replacement hypervisor
is rarely the expensive part of the swap; the retooling around it is where
the money actually goes. Budget for the ecosystem.
Option 3: Lift the estate to cloud, mostly as-is.
Every major cloud will happily run your VMs, and for workloads with a
limited remaining lifespan this is often the right call: you’re buying
yourself a way out of the datacenter. Be clear-eyed about what it is,
though. Your cost model shifts from a big renewal every few years to a
bill every month, and if you treat cloud like a rented datacenter
permanently, you’ll pay rented-datacenter prices permanently. This
branch works if you actually keep moving once you land.
Option 4: Re-platform what actually deserves it.
Some fraction of your estate (usually smaller than the modernization
deck claims) genuinely benefits from moving to managed services,
containers, or PaaS. The way to find that fraction is not a vendor’s
assessment tool defaulting to “yes.” It’s asking, per application: who
maintains this, what breaks if we touch it, and what do we get for the
effort? “It’s technically possible” doesn’t answer any of those questions.
What actually decides bake-offs
Having sat on the vendor side of plenty of these evaluations, let me tell
you what separates the teams that land well from the teams that don’t. It
isn’t the platform choice. It’s three unglamorous things:
A real inventory. And I don’t mean the CMDB. I mean the actual
estate, including the forgotten VMs that turn out to run the badge
readers. Every difficult migration I’ve ever seen got difficult in the
discovery gap.
A named owner per workload. Migrations stall when no one in
particular owns an app; everyone’s job ends up at the bottom of
everyone’s list.
A definition of done that includes operations. “It boots in the new
place” is not done. Backup, DR, monitoring, patching, and the on-call
runbook are done.
There’s no vendor-neutral answer to “where should it all go,” and anyone
who gives you one before seeing your estate is selling something. But
there’s always a sequenced answer — this workload now, that one at
renewal, those three never. The order you move things in matters more
than the destination you picked.
I’ll go deeper on each branch in future posts, including the hybrid
patterns for the workloads that genuinely can’t leave the building. Data
residency, latency-pinned manufacturing floors, and regulators all exist,
and a plan that ignores them only works on the slide.
Thanks for reading!
]]>Lee CoxThe architect’s seat2026-07-19T10:00:00-05:002026-07-19T10:00:00-05:00https://leecox.pro/career/the-architects-seatJob titles in enterprise tech are terrible at describing jobs. Mine have
included Customer Engineer, Solutions Architect, Principal Consultant,
Cloud Solution Architect, and Principal Solution Engineer. Functionally,
they were all versions of the same seat: the person in the room who has to
turn “what should we do?” into an architecture, and an architecture into a
decision someone will actually fund.
This thread of the blog is about that seat. Consider this the origin story
post.
The long road version, compressed
I started in network closets, in healthcare IT, pulling cable and keeping
small hospital systems alive. Went to HP and worked my way through
mission-critical support into presales architecture for big compute deals.
Did a stretch at Ericsson designing carrier-grade virtualized network
functions, where “five nines” stops being a slide and starts being a
contract (with penalty clauses). Landed at HPE architecting hosted cloud
for service providers right as the industry was deciding what “private
cloud” even meant. Then nearly a decade at Microsoft, with the last
six-plus years in the Global Black Belt organization, the specialist
overlay that works the hardest migrations and the most skeptical accounts.
The through-line isn’t a technology. It’s altitude-shifting: being able to
talk to the CIO at nine, the storage admin at ten, and mean the same thing
in both rooms. That skill (not any certification) is the job.
What the seat actually teaches you
A few things the briefing rooms and datacenter floors have taught me that
I never got from a course:
Trust compounds faster than expertise. The most valuable sentence in my
vocabulary has always been “honestly, our product isn’t the right fit for
that.” I’ve told customers to stay on a competitor. Some of those accounts
came back years later and bought more than they ever would have the first
time around, because when I said something was a fit, they believed me.
The technical answer is maybe forty percent of the job. The rest is
sequencing, budget reality, org politics you’re polite about, and finding
the one person in the customer’s shop who actually knows where the bodies
are buried. Most of the failed projects I’ve watched had a perfectly fine
architecture diagram.
Writing is a superpower in a slideware industry. The architects who get
listened to are the ones whose documents survive being forwarded. If your
recommendation can’t be understood without you in the room, it isn’t
really a recommendation yet. You were just presenting.
The part where the org chart gets deleted
In early July, Microsoft eliminated our entire Infrastructure GBB
organization. It wasn’t performance-based; it was structural. The whole
org went away at once, my seat included.
I’m not going to dress that up, and I’m also not going to perform grief
about it. It’s the industry we work in. The same forces that made my last
several years fascinating (cloud economics, AI capital reallocation)
draw the org charts, and sometimes they erase yours. If it happens to you,
my early field notes: file the paperwork the same week, tell your network
plainly and without shame, and get specific fast about what you want next.
Vague availability helps nobody, including you.
So, what do I want next? The short answer is: a place doing serious
infrastructure work (cloud, hybrid, AI platforms) where I can spend a good
long while, ideally the kind of tenure I’ve had before. The longer answer
is a post of its own. The conversations are happening. In the meantime, I
have a garage full of projects and years of field notes to publish, which
is what this site is.
More in this thread: how executive briefings actually work, what
competitive bake-offs look like from the inside, and the unreasonable
career value of being the person who writes things down.
Thanks for reading!
]]>Lee CoxFrom BIOS to first token: standing up an NVIDIA A2 at the edge2026-06-22T10:00:00-05:002026-06-22T10:00:00-05:00https://leecox.pro/ai-infra/from-bios-to-first-tokenEveryone’s AI infrastructure story starts in a datacenter with a rack of
DGXs and a power bill that needs its own approval chain. Mine starts in a
22U rack next to the water heater, with a Lenovo SE350 (a ruggedized edge
server about the size of a large hardcover book) and a single NVIDIA
A2 — 16 GB of GDDR6, low-profile, sipping around 40–60 watts. The
Warthog of GPUs. Nobody writes keynotes about it, but it goes everywhere,
survives everything, and it’s the vehicle you actually drive through the
whole campaign.
I’ve spent years advising enterprises on GPU platform strategy from the
architect’s seat (factory-floor vision systems, store-edge inference at
national scale), and the honest truth is that if you count the sites
instead of the FLOPs, far more enterprise AI deployments run on cards
like the A2 than on anything that gets a launch event. So when it came
time to build the edge-inference tier of
my home lab, I
wanted the real experience: bare metal to generated token, every step
scripted, every gotcha documented. This post is that story.
The stack, and why each layer won
Ubuntu 24.04 LTS. Yes, the decade-ish-at-Microsoft guy put Ubuntu on
it. (This box spent its previous tour running AKS with Azure Linux, as
described in the lab post; that build got wiped for this one, because I
wanted the vendor’s happy path from bare metal.) The short answer is
that the support matrix is the boss. NVIDIA
publishes exactly which OS/kernel combinations are validated for the A2
and which rows of the GPU Operator’s driver-container matrix get
precompiled images: 24.04 on the 6.8 kernel is the happy path, 22.04 on
the same kernel falls back to a slower DKMS build, and the shiny new
26.04 LTS isn’t in the matrix yet at all. When the vendor hands you a
validated-configurations table, you read it and you obey it. I tell
customers this weekly; it would be poor form to ignore my own advice in
my own rack.
k3s. Single-node edge Kubernetes with the operational weight of a
sandwich. The enterprise version of this conversation involves fleet
management and a fleet-scale distro, but the Kubernetes API is the
Kubernetes API — which is the entire point of the exercise.
NVIDIA GPU Operator. If you haven’t watched it work: the Operator can
own the entire GPU enablement stack, driver included — hand it a bare
node and it will do the rest. In my build the driver lands on the host
first (script 01 of my pipeline — old habits from years of hand-built
nodes), so the Operator runs with driver.enabled=false and manages
everything above it: container toolkit, device plugin, DCGM monitoring,
all as Kubernetes-native objects it keeps healthy. (If you let the
Operator own the driver too, the install-order gospel below relaxes —
that’s half of why the Operator exists.) Either way, the first time
nvidia-smi runs in a throwaway CUDA pod you didn’t hand-configure,
you get the same small thrill as the first ping across a network you
built. Validation is scripted: if the pod can’t see the silicon, the
pipeline stops, loudly.
KAITO, in bring-your-own-GPU mode. Microsoft’s Kubernetes AI
Toolchain Operator, pointed at my own node instead of provisioning cloud
GPUs — exercising its workspace CRD against hardware I already own,
which is the part enterprises with existing GPU fleets actually care
about. And the Microsoft-operator-managing-NVIDIA-silicon crossover
episode felt like required viewing given my résumé.
NVIDIA Dynamo, fronting a vLLM worker. The serving layer: Dynamo’s
frontend with a single vLLM worker (the vllm-runtime:1.3.0 image from
NGC, serving a small Qwen3 model to prove the plumbing). Is a
datacenter-scale serving framework overkill for one 60-watt-ish card?
Completely. That’s the point — the shape of the deployment is the
shape enterprises run at scale, so the frontend, the worker lifecycle,
and the deployment topology all transfer when one worker becomes forty.
(With one worker, the fancy disaggregated prefill/decode split stays
strictly theoretical — I know exactly which Dynamo features need a
bigger fleet than mine.) Plus a Hugging Face model served through TGI on
the same box — not at the same moment, mind you: the device plugin hands
out the card whole, and vLLM books most of the 16 GB the second it wakes
up, so the serving stacks are roommates who take turns. Kicking the
tires on two of them on identical hardware is exactly the kind of thing
this lab exists for.
The gotchas (collect them all)
A few things between power-on and first token that the quickstarts don’t
mention:
Secure Boot will eat your driver install if you let it. The prep
script checks for it first, because discovering it after the
driver “installed successfully” is a rite of passage I only needed
once.
Order is everything — in a host-managed-driver build. Driver
readiness before Kubernetes, Kubernetes before Helm, GPU Operator
before any workload dares mention a GPU. My scripts are numbered 00
through 09 because the dependencies are genuinely that linear — and
each one checks current state before acting, so re-running anything
is safe. Idempotence is the difference between automation and a very
fast way to break things twice.
16 GB is a budget, not a suggestion. The A2 will happily serve a
small quantized model, vision workloads, or embeddings all day on a
thermal envelope that doesn’t require explaining anything to the
power company. Ask it for more and it will politely decline. Edge
inference is mostly an exercise in living inside the VRAM you
brought.
Remote management is step nine, not step zero-point-nine. Once the
GPU tier worked, the box got the full treatment (SSH hardening,
Tailscale, Cockpit, k9s) and joined the
agent-managed lab
like everything else in the rack.
Why this matters beyond my water heater
So what does a hobby box next to a water heater have to do with
enterprise AI strategy? It’s a fair question. In the enterprise
engagements I’ve worked (automotive plants, national retail footprints),
the edge AI conversation is never about the biggest GPU. It’s about
exactly what this build practices: modest silicon in hostile places,
driver lifecycle you don’t hand-touch, Kubernetes as the control plane,
and a serving layer whose shape scales from one worker to hundreds
without changing the architecture. The SE350 + A2 combo is my one-node
rehearsal of a pattern I’ve watched deploy at real fleet scale.
The useful lesson for the platform-strategy crowd: the stack above mixes
NVIDIA’s operator and serving layers, a Microsoft AI operator, an
open-source inference engine, and a community Linux — and the support
matrix, not the logo, decided every layer. That’s the actual state of
enterprise AI infrastructure in 2026, and the architects who accept it
early save their customers a lot of money (and a lot of awkward vendor
meetings).
Next up in this series: what a 16 GB card can honestly do — model sizes,
quantization trade-offs, and where the A2 taps out versus its bigger
siblings. The token counter is running.
Thanks for reading!
]]>Lee CoxAgentic management of a personal home lab running Windows Server, Azure Linux, and Azure Local2026-06-15T14:00:00-05:002026-06-15T14:00:00-05:00https://leecox.pro/workbench/agentic-management-of-a-personal-home-labEvery home lab has the same dirty secret: the gap between what’s racked and
what’s managed. The gear accumulates faster than the discipline. Firmware
drifts, the documentation lives in your head, and the network diagram
exists mostly as a feeling. I’ve run labs for a couple of decades and made
peace with the truth that a lab is a second job that pays in knowledge and
charges in weekends.
This year I changed the deal: I gave an AI agent a seat in the lab as
operations staff. Not a chatbot to ask questions — GitHub Copilot in agent
mode, with a terminal inside the lab, a documentation repo, and a steadily
growing set of responsibilities. It works well enough that this post is a
how-to. Stream of consciousness ahead (fair warning). Read the
whole thing before you touch anything.
General Disclaimer — You’re on your own. You are about to give a
language model a shell inside your network. Done the way I describe, the
blast radius is contained and the lab stays isolated from the internet. Done
lazily (tunnel on your domain controller, auto-approve everything), you’ve
built a very enthusiastic intruder. Don’t go complaining to me, GitHub, or
Microsoft when it deletes a VM you loved.
The lab (so you can calibrate)
Mine is seven physical nodes, 768 GB RAM total, in (and around) a 22U
rack: a two-node
Azure Local 2603 cluster on Lenovo SE350 edge servers, a standalone
Windows Server 2025 Hyper-V box on an EPYC 4464P build (with a pair of
HPE DL360 Gen9s staged behind it — cough — old habits), a Lenovo MX1021
queued up for its slot, and an SE350 carrying an NVIDIA A2, currently
being stood up as the edge-inference node (that build — and the Kubernetes
flavor it lands on — gets its own post). Arc-enabled everywhere, because half the point is
living with the same management plane I’d recommend to a customer. None of
this is required — the pattern works on two NUCs. What matters is the
topology, so let’s start there.
Step 1: Topology — isolation is the whole foundation
The security model of everything below rests on one fact: the lab is its
own island. Mine runs on its own internet connection and its own network,
physically separate from the network my family and my work machines live
on. Yours doesn’t need a second ISP — a dedicated VLAN with deny-by-default
rules to your home network accomplishes the same thing. The requirements:
No inbound ports from the internet. None. Everything below works on
outbound connections only.
A management VM inside the lab. This is the agent’s body — a plain
Windows Server VM on the Hyper-V host (Linux works fine too). Install
the tools an admin would have: RSAT, the PowerShell modules for your
stack, kubectl, git. This box has line-of-sight to the nodes.
Out-of-band management stays out of reach. BMCs (iLO, XCC, iDRAC)
live on a management network the agent’s VM cannot route to. The
agent never needs to reflash firmware, and neither does an intruder.
Same for your identity infrastructure and firewall administration.
Humans only. This is the line I do not move.
Step 2: VS Code Remote Tunnels — the drawbridge
You need to reach that management VM from wherever you are, without opening
a single port. That’s exactly what VS Code Remote Tunnels do: the VM
makes an outbound connection to the tunnel service, authenticated through
your GitHub account, and your VS Code client (or vscode.dev in a browser)
connects through it.
On the management VM (pick your own tunnel name; I’ll use lab-mgmt in
the examples):
winget install Microsoft.VisualStudioCode.CLI
code tunnel user login --provider github
code tunnel service install --accept-server-license-terms --name lab-mgmt
The login command hands you a device code to sign in with, and the last
command registers the tunnel as a service so it survives reboots. From
anywhere in the world, VS Code → Remote Explorer → lab-mgmt, and you
have a terminal inside the lab. Protect the GitHub account like the crown jewels it now is:
hardware-key 2FA, because whoever holds that account holds your drawbridge.
Two gotchas that cost me time so they don’t cost you any: run the service
as an account with the admin rights you actually want the agent to have
(service install defaults are conservative), and if the tunnel name doesn’t
appear, check that the service actually started — Windows will happily
install it stopped.
Step 3: GitHub Copilot — hiring the staff
Open the tunnel session, sign in to GitHub Copilot, and switch to
agent mode — the mode where it can run terminal commands, read files,
and iterate, not just complete lines. Now the important part, because the
default settings are wrong for this job:
Do NOT blanket-auto-approve terminal commands. Copilot will ask
before running commands; keep it that way for anything mutating. I
allowlist a small set of obviously read-only patterns (Get-*,
kubectl get, git status) and approve everything else by hand.
Approvals are per-workspace. Set them in the lab workspace, not user
settings, so the posture travels with the repo.
CAN you auto-approve everything and let it rip? Sure. You can also hand a
new hire domain admin on day one. The lab might even survive it. “Might”
is doing a lot of work in that sentence.
Step 4: The docs repo — ground truth the agent reads and writes
Create a private repo (mine has a suitably boring name) and open it
as the workspace in every tunnel session. Structure it the
way you’d brief a new admin. Mine:
00-lab-overview.md        # what this place is, quick stats, diagram
01-hardware-inventory.md  # every node: model, CPU, RAM, storage, NICs, role
02-network-topology.md    # subnets, VLANs, switch ports
03-clusters-workloads.md  # what runs where and why
04-identity-security.md   # accounts, the rules, what's off-limits
05-management-access.md   # how humans (and the agent) get in
06-ip-reference.md        # assignments and reservations
Keep credentials out of it. Names and addresses of things, yes. Secrets,
never — the agent doesn’t handle credentials at all in this design; it runs
as the identity you gave the tunnel service, and that identity has exactly
the rights you chose. The repo stays private either way: your rack layout
is nobody’s business (yes, I just told you mine, but the difference is
that I picked what to share).
Every agent task starts from these docs instead of rediscovering the
network, and (this is the part I didn’t see coming) the agent
maintains them. Repatch a switch port, retire a VM, and the doc updates
in the same session, same commit. Twenty years of “I’ll document it later”
ended the month the documentation became something my staff needed to do
their job.
Step 5: Skill development — the part everyone skips
Out of the box, the agent is a talented generalist who knows nothing about
your lab and has no manners. Both problems are fixed the same way:
instruction files — and treating them like a skill you’re developing,
not a config you set once.
Start with .github/copilot-instructions.md in the docs repo. Mine boils
down to house rules:
Read the relevant doc before touching anything; cite what you checked.
Read-only is free. Propose mutations before running them — exact
commands, expected effect, rollback.
Never touch BMCs, identity, or firewall config. Don’t ask.
Verification before “done”: show the hotfix list, the validation output,
the pod states. A summary is not evidence.
Update the docs in the same session as the change.
Then grow a library of prompt files — reusable skills for routines:
patch-scan.prompt.md (inventory update status across the Azure Local
cluster and the Hyper-V host, report only), health-check.prompt.md,
doc-sync.prompt.md (walk the inventory, verify it against reality, flag
drift). The development loop is simple: every time the agent does
something wrong or dumb, the correction goes into the instructions. It
misread which node was the cluster witness once; the docs got a clarifying
line and it never happened again. That’s the skill (yours and its)
compounding in the repo, in version control, reviewable like everything
else.
Step 6: Execution — what a working day looks like
With the pieces in place, the rhythm is almost boring, which is the point:
Questions are free. “Which nodes are behind on updates?” “What’s
eating the storage pool?” A sentence goes in and a cited answer comes
out, and nothing needed approval because nothing mutated.
Changes are proposals. “Stage the June updates on the Azure Local
cluster” produces a plan (order, commands, expected reboots) and then
waits. I approve, it executes, and it shows receipts before the word
“done” appears.
The long tail is where it shines. Arc extension quirks, AKS node
image updates, the research-then-do work I used to burn evenings on —
the kind of thing the posts I wrote for
our team blog were made of, now executed by staff
while I review.
First of everything gets watched. The first time a new task type
shows up, I babysit it. The second time I spot-check. By about the
fifth time, it has become a prompt file.
The honest close
Is this more setup than pointing a chatbot at your lab? Yes, by a lot.
But it’s also the difference between a party trick and an operating model. The
pattern is isolated network, outbound-only access, docs as ground truth,
skills in version control, humans holding approvals and identity, and
verification as a gate. I think that’s the shape enterprise operations is
drifting toward. The lab is where I get to find the sharp edges first, on
hardware where the worst case is my weekend instead of someone’s business.
Next up in this thread: the SE350 + NVIDIA A2 edge inference build, from
BIOS to first token, and what a 16 GB GPU can honestly do at the edge.
Thanks for reading!
]]>Lee CoxBuild 2026 post-mortem: fog, first tokens, and a badge that says EXPERT2026-06-07T15:00:00-05:002026-06-07T15:00:00-05:00https://leecox.pro/career/build-2026-post-mortemI’m writing this from the couch, properly wrecked, with a conference
badge on the counter that says EXPERT in a reassuring shade of blue.
(The badge printer doesn’t know about impostor syndrome. The badge
printer simply believes.) Build 2026 is in the books, and since the
whole week was equal parts teaching, booth duty, and staring at the
Golden Gate Bridge between sessions, it deserves a proper post-mortem.
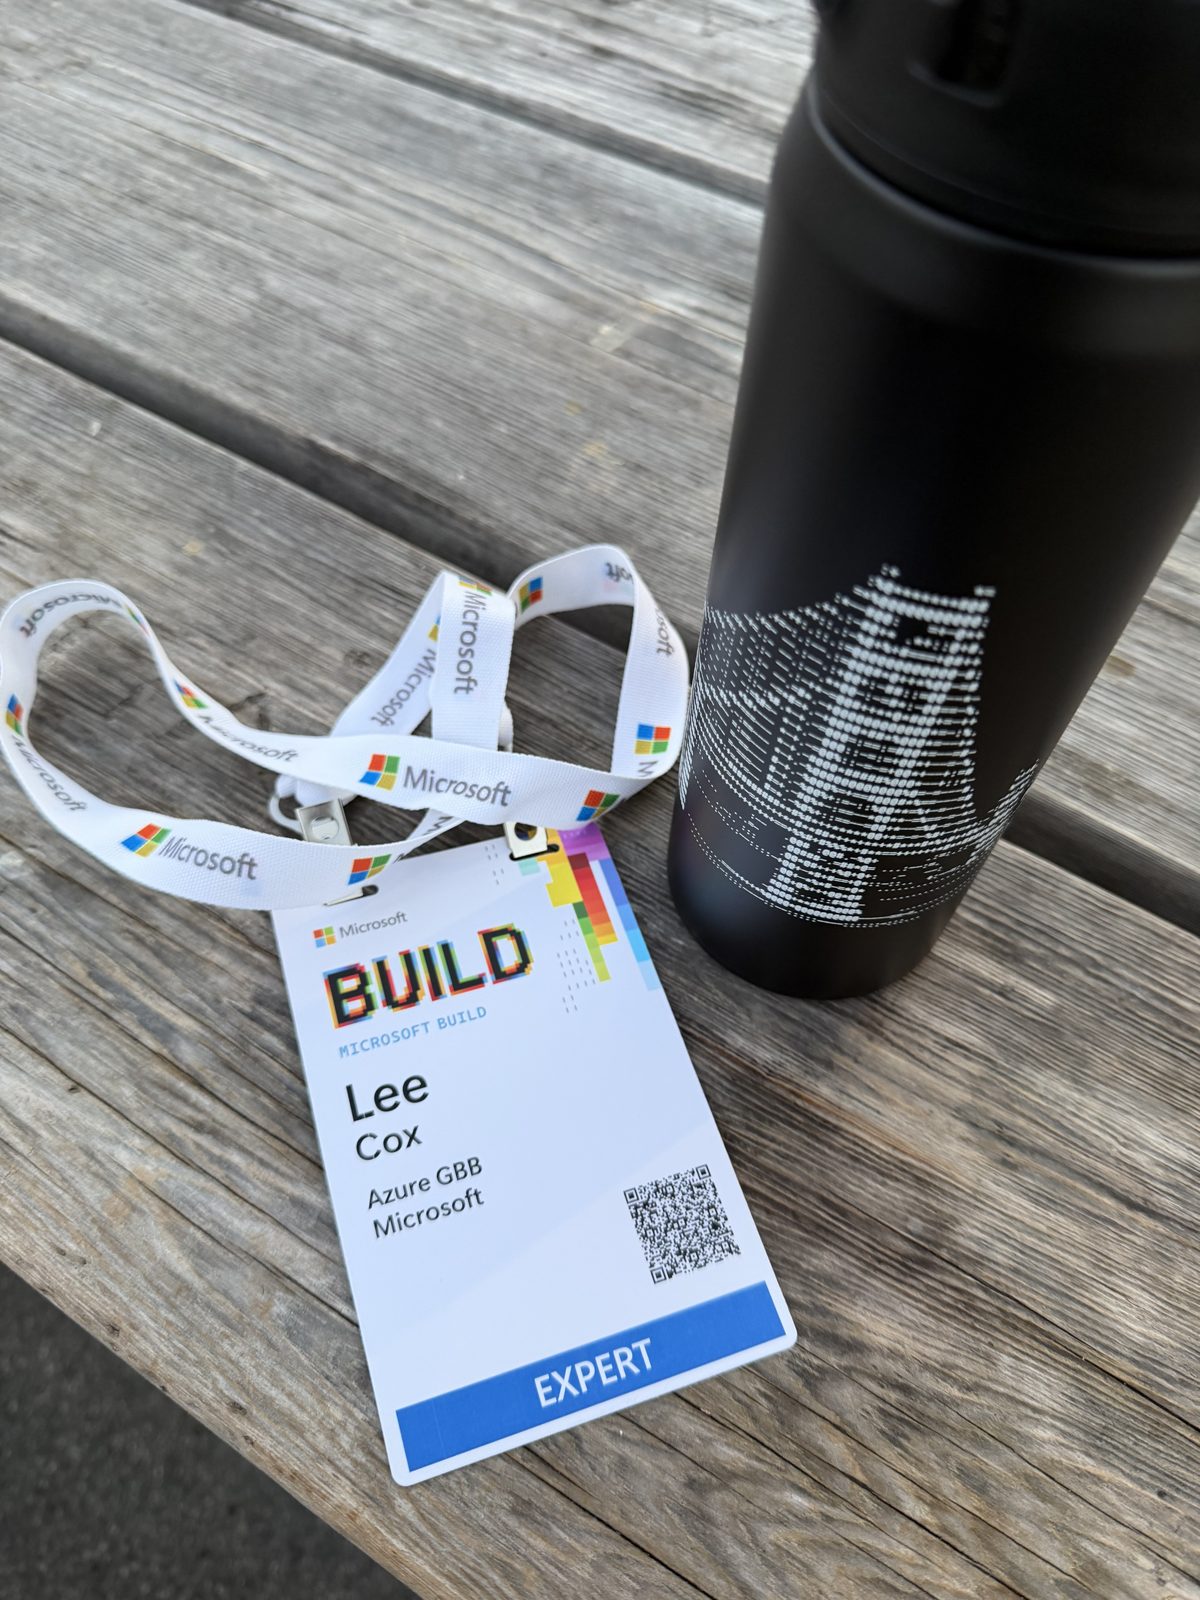
The badge believes in you. The bottle is elite swag — that's the Golden Gate in ASCII.
The venue: Fort Mason, which cheats
This year’s Build ran on the San Francisco waterfront, in the old pier
buildings at Fort Mason — and let’s be clear, it’s unfair to put a tech
conference somewhere this pretty. Walk out of a session and the Golden
Gate is right there, doing its postcard routine over the water.
Alcatraz sat moodily in the fog behind the stacks of road cases like it
had been art-directed. At one point a flotilla of kayakers paddled into
the lagoon between the piers, flags up, just to watch the circus. Ten
years of convention centers did not prepare me for a venue with
seagulls and a view.
Lab 510: running a model ≠ production readiness
My main job for the week: proctoring Lab 510 — taking LLMs from
prototype to production on AKS. The session’s opening slide is the
whole thesis, and I’d staple it to a few conference-room whiteboards
if facilities would let me: running a model is not production
readiness. The lab
walks through the five things that close that gap: repeatability,
routing, observability, scaling, and a consumer-friendly endpoint.
Then it makes attendees earn each one on a live cluster.
Proctoring is its own discipline. You’re not presenting; you spend the
session walking rows of monitors, watching a room full of people hit a
room full of different walls, and the walls are the curriculum.
Watching where people actually
get stuck in a hands-on AI lab is the best field research there is:
almost nobody struggles with the model. They struggle with everything
around the model — the plumbing, the endpoints, the “why can’t the
cluster see my deployment” moments. Which is to say: the production
part. The slide is right, and the room proved it all session, every
session.
Booth duty: explaining Azure Linux until my voice gave out
Between lab sessions I worked the showroom floor at the Azure Linux
booth with my teammate Carlos, who is both excellent company and the
kind of colleague who can hold three technical conversations while
pointing a fourth person toward coffee. Booth duty at Build is speed
chess: forty-five seconds to figure out if the person in front of you
wants the elevator answer (“it’s Microsoft’s own Linux distribution —
it runs under more of Azure than you’d guess”) or the real
conversation, which at this show was AKS node pools, edge deployments,
and a surprising number of people quietly asking about the same
small-GPU inference patterns I bang against in my own rack. The
distance between my day job and my hobby has never been shorter, and
booth conversations are where you feel it.
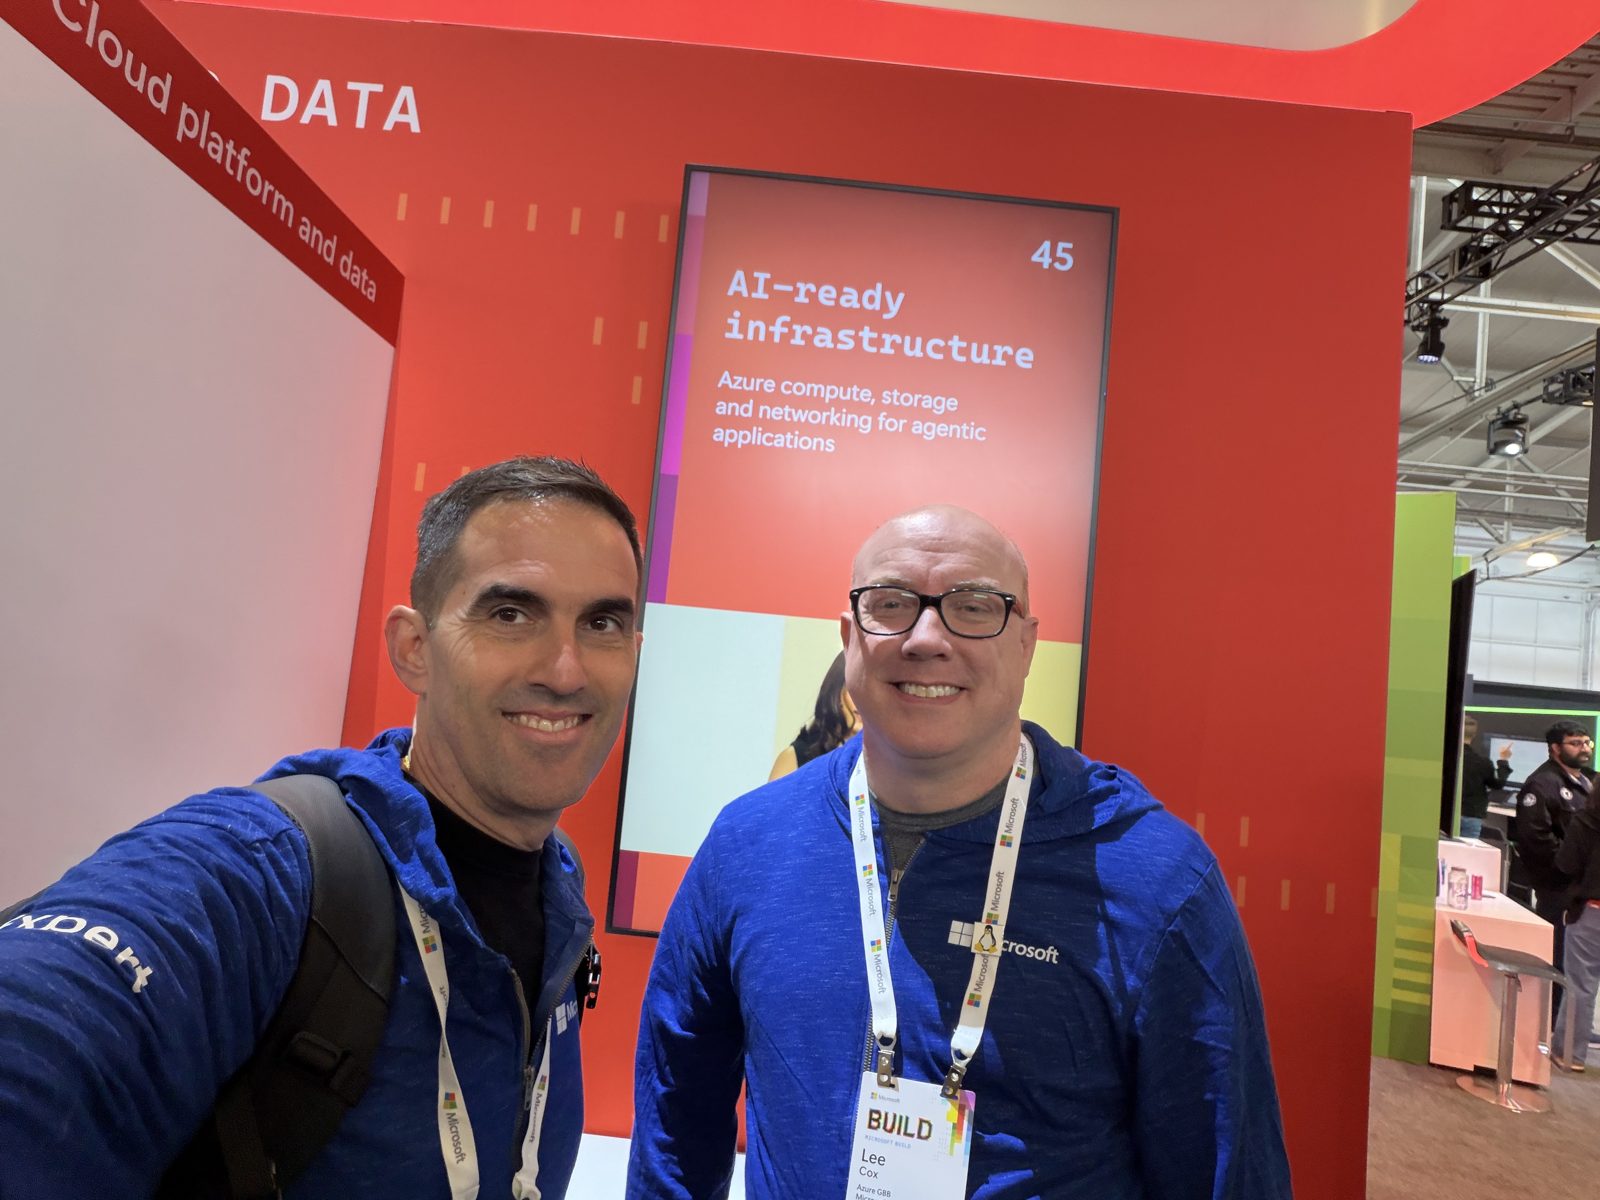
Booth crew at the Azure Linux station. Note the Tux pin on the lanyard; the penguin worked the booth too.
The Satya-and-Jensen show
Keynote highlight, no contest: Satya Nadella in person, with Jensen
Huang beaming in ten feet tall on the side screens, for the
announcement of the RTX Spark line. I’ve watched a decade of these
keynotes from home with coffee; being in the room when the NVIDIA and
Microsoft logos came up side by side hits different.
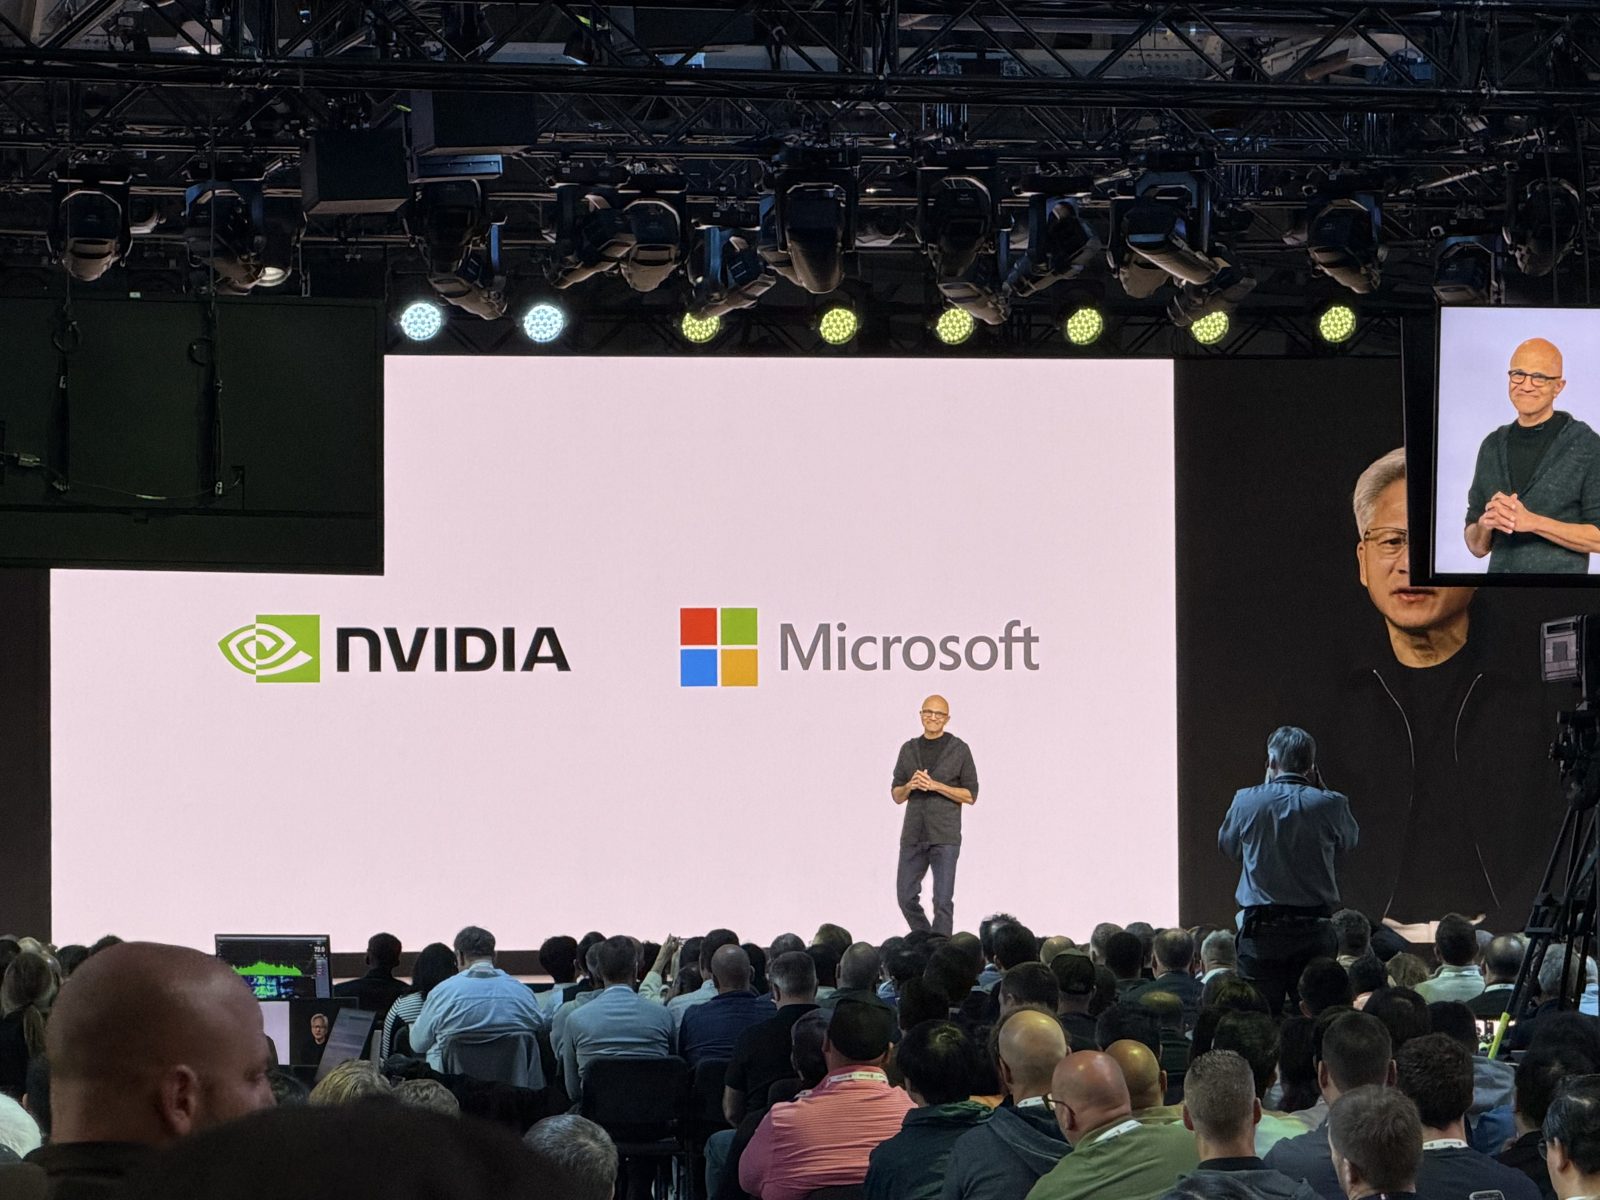
Satya on stage, Jensen ten feet tall on the side screens, and two logos that spend a lot of time together in my rack.
Whatever else you want to say about this industry’s current moment, the
two companies whose stacks I spend my days (and, let’s be honest, my
nights) wiring together were on one stage pointing the same direction.
I’ll have more to say about the small-end-of-the-GPU-market implications
once I’ve digested the announcements properly — the edge-inference
corner of my brain was taking notes the whole time.
The city, all of it
Two more San Francisco notes, because a post-mortem should be honest
about the whole week and not just the badge-scanned parts.
The protesters were part of the week too. On the hill above the
venue, demonstrators hung banners about AI datacenters and the
company’s business, and you could see them from the piers all week.
I’m not going to
pretend they weren’t there, and I’m not going to pretend a conference
about deploying AI at scale has nothing to do with the questions being
raised. You can believe in the work and still believe the hard
questions deserve to ride along. They walked with me to the lab more
than once.
And the Waymos. First ride of my life early in the week; by Friday
I’d stopped counting. I’m the guy who reprograms his own
cars, so understand the gravity of this
sentence: I got into a car with no driver, no steering input from me,
and no gateway config I was allowed to touch, and within four minutes
it was the most normal thing in the world. The lane discipline is
genuinely better than half of Nashville. I have a hundred car-guy
questions about the sensor stack, but honestly I spent most of the
rides just looking out the window at the hills. I want to go back.
The take-homes
A water bottle with the Golden Gate rendered in ASCII (elite swag,
whoever approved that gets a raise), a voice that needed two days of
rest, a phone full of pier photos, and the same conviction I brought
home from the lab room: the models are the easy part now. The
production engineering (the repeatability, the routing, the
observability, all the boring plumbing) is where the actual work
lives, at every scale from my SE350 to the clusters those keynote
slides were built on.
It was a great week with a great team in a frankly ridiculous venue,
and I’ll have more soon from the rack.
Thanks for reading!
]]>Lee CoxHello, world (again)2026-05-24T10:00:00-05:002026-05-24T10:00:00-05:00https://leecox.pro/hello-world-againEvery tech blog starts with one of these posts, and most tech blogs
quietly stop posting a month or two later. I’m aware of the odds. Let’s
do it anyway.
I’m Lee Cox. I’m an enterprise architect at Microsoft by day, and by
night (and the occasional weekend that gets away from me) I’m a home lab
operator, a car tinkerer, and a person who cannot leave well enough
alone when a piece of hardware says “no user-serviceable parts inside.”
I’ve written plenty over the years for work — team blogs, whitepapers,
the odd conference talk — but this site is the personal one. The “(again)”
in the title is doing some work there.
So what goes here? Musings, mostly. On tech, on the business side of
tech (twenty-plus years in the field gives you opinions whether you
wanted them or not), on cars (a couple of projects are always in flight
in my garage), and on tinkering in general — the home lab, the tools,
the small stubborn projects that teach you more than the big planned
ones do.
No content calendar, no niche strategy, no promises. Posts land when
something is worth writing down. If that sounds like your kind of
corner of the internet, grab the RSS feed and pull up a
chair.
Thanks for reading!
]]>Lee CoxVMware Migration Quest with Microsoft2025-03-07T15:29:19-06:002025-03-07T15:29:19-06:00https://leecox.pro/gbbcore/vmware-migration-quest-with-microsoft-2Part 2: Charting a new way
In Part 1 of this series, we discussed many of the motivators, needs, and planning for a VMware migration to Microsoft solutions. We also covered the quickest paths to accomplishing that type of migration into Azure for time sensitive needs. However, as we know not every workload can move to Azure. Some for governance and compliance reasons and some for technical reasons. But you’ve been asked to find ways to optimize your environment and reduce your spend. There are a bunch of ways Microsoft can help you there in Azure. And a few we can help you with outside of Azure while maintaining the advantages of cloud management.
This post, and the one after it, will be a bit different than the first. In the first post, the options are straightforward, and the patterns well established. It’s an easier read because cloud solutions have a simpler adoption curve. Microsoft Adaptive Cloud solutions are straightforward but also nuanced and, like all on-prem solutions, have more moving parts leading to added complexity. I’ll do my best to give you the design intent, theory of operation and implementation for the options, but ultimately only you can decide what works, or doesn’t, within your organization.
After taking our quick wins with the fastest path to migration with Azure, we now set off on a different leg of our migration quest, an on-premises transformation. On this path, we’ll pick up a few new party members and train some new skills while honing some older ones. The terrain is different, if familiar, and there are some steep climbs. If Azure VMware Solutions (AVS) and Azure IaaS are like Fast Travel to the best parts of the game, On-prem transformations are like grinding your favorite dungeons to level up!
All roads lead to Arc
The end state is important to understand to have context for the journey. Microsoft believes strongly in a single pane of glass for management. That single pane of glass is the Azure control plane powered by Azure Resource Manager (ARM). Azure native services benefit from the monitoring, reporting, automation, identity and security of the Azure Portal and API experience. Resources outside of Azure weren’t really able to take advantage of these management tools in a holistic way before the advent of Azure Arc.
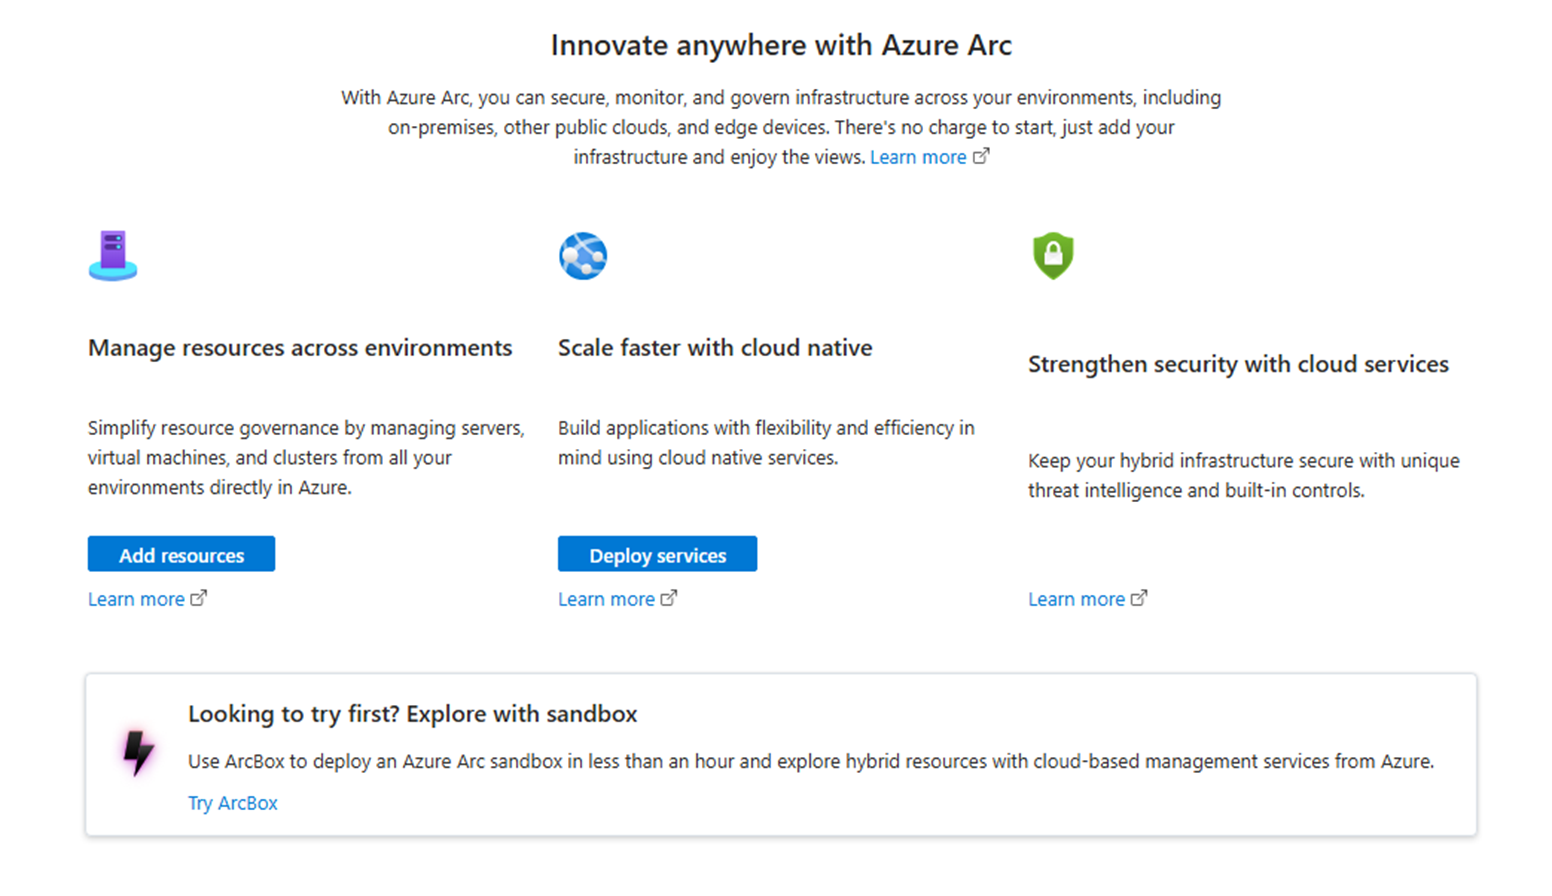
Azure Arc Landing Page
Azure Arc in its simplest form is a projection service. It allows “things” that exist outside of Azure to be seen within Azure. That one VERY simple concept is really powerful when you consider all the class leading management capabilities and services available within Azure. It allows the same organization benefits of Resource Groups, Tagging, Azure Graph and Search customers enjoy with Azure VMs, IaaS, PaaS services to work on things that aren’t “IN” Azure. It also provides the same security benefits with EntraID and Identity Access Management (IAM) integration. Those are just the start though. You’ll pick up a ton of additional benefits as you start to use other Azure services. Things like Azure Monitor, Defender for Cloud, Azure Update Management, Key Vault, IoT Services, and the list goes on.
Azure Arc works with on-prem platforms like Azure Local, VMware, SCVMM and Kubernetes clusters. It provides visibility at the OS level too not just with Windows, but also all the popular flavors of Linux. This isn’t restricted to Virtual Machines either, physical servers are supported as well. It also helps to future proof your existing on-prem and legacy workloads by connecting them to cloud management services and concepts. This is all done through outbound connectivity over encrypted connections. It can also communicate over proxy, ExpressRoute, VPN and Private Endpoints.
Arc started as a single agent-based connection and has grown into an entire portfolio of services customers can consume to manage their large sprawling estates. vSphere and SCVMM have a single VM Kubernetes cluster called an Arc Resource Bridge(ARB) which feeds environment information into Azure. We have customers with thousands of systems being managed by Azure Arc today either centrally in a datacenter or in a distributed edge environments. All of this being done for some of their most business critical workloads.
So, what does this have to do with on-prem VMware migration with Microsoft? It’s a fair question. The answer is everything. Microsoft’s on-prem solutions use Azure Arc integration as a bridge to Azure. If you want to transform your environment over to Microsoft solutions, the north-star for us is Azure. How are all of these things managed? The answer is Azure. Even the latest and greatest versions of Windows Server and SCVMM offer direct access to Azure Arc out of the box. Microsoft also helps our customers take advantage of many Azure services through the Arc portfolio completely free if you have an active Software Assurance agreement.
Let’s look at the first option for your on-prem workload’s that can’t go to cloud.
Pros: On-Prem Azure managed OEM hardware for legacy and modern apps
Cons:
Net new hardware required
Not a datacenter virtualization replacement
Deployment and VMware workload transformation can be lengthy
Azure Local Solution Overview
Given the directional nature of the solution information provided, and attempting to write for brevity, this won’t be an all-inclusive review of Azure Local or its capabilities. There is plenty of that content already available. Nor should it be treated as a substitute for official Microsoft documentation. Writers are fallible and solution options and capabilities can change over time. Please refer to the official Azure information sources linked in this post for detailed and up-to-date information.
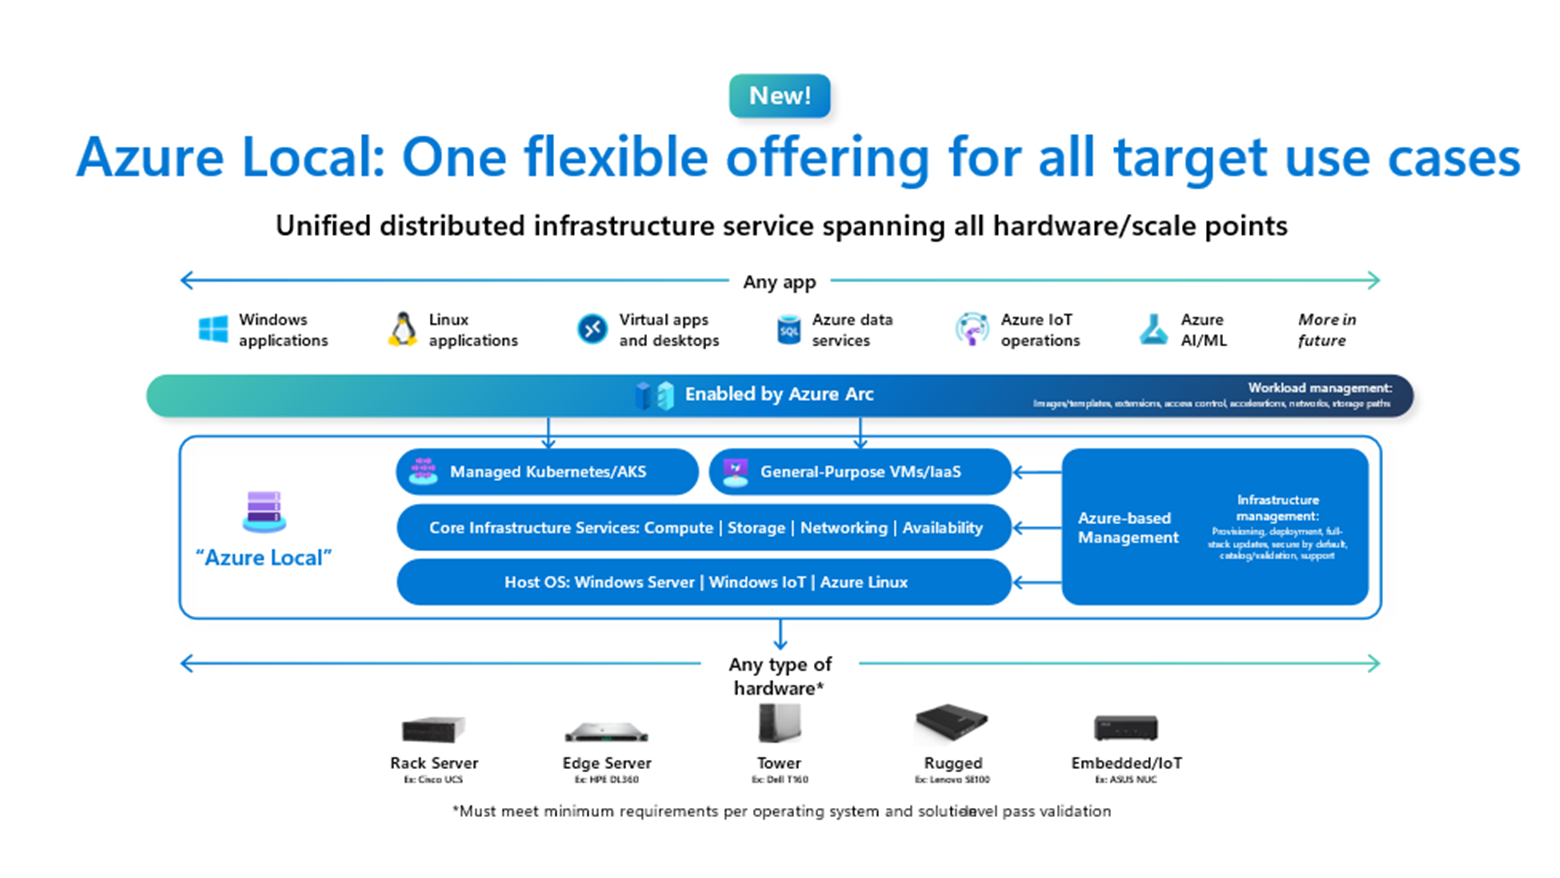
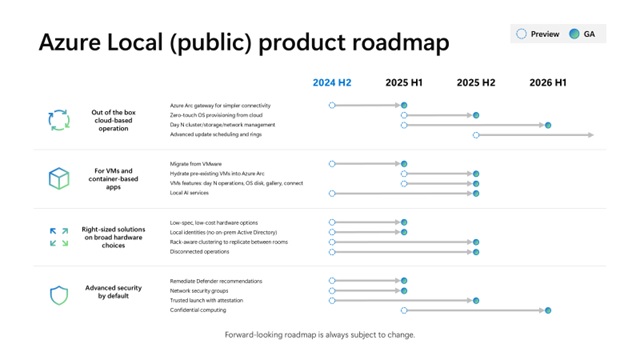
Azure Local is a newly announced portfolio of on-prem OEM partner hardware solutions that connect directly into the Azure control-plane through Azure Arc. Today, we have a single “Connected Servers” option that was formerly known as Azure Stack HCI. It’s built from the ground up on the Azure Kernel code-base to offer an ever improving set of services and solution offerings. Over time the other two options in the family will become available. The Low-End Hardware option will be single or multiple node options with either an Azure Linux deployment or Azure Local (Windows Kernel) deployment all driven from Azure. The Disconnected option will have a local management service control-plane that allows you to deploy and run Azure Local completely disconnected from Azure public cloud.
Yeah, I know… there’s a lot there. So let’s break down what you can get right now and how. The middle “Connected Servers” options is currently the only one Generally Available (GA), meaning you can purchase, deploy, and get support for the product. You’ll contact your preferred OEM, after looking at your options in the Azure Local Catalog, who you’ll work with to size an environment. They’ll offer one or more different types of solutions. Azure Local comes in today:
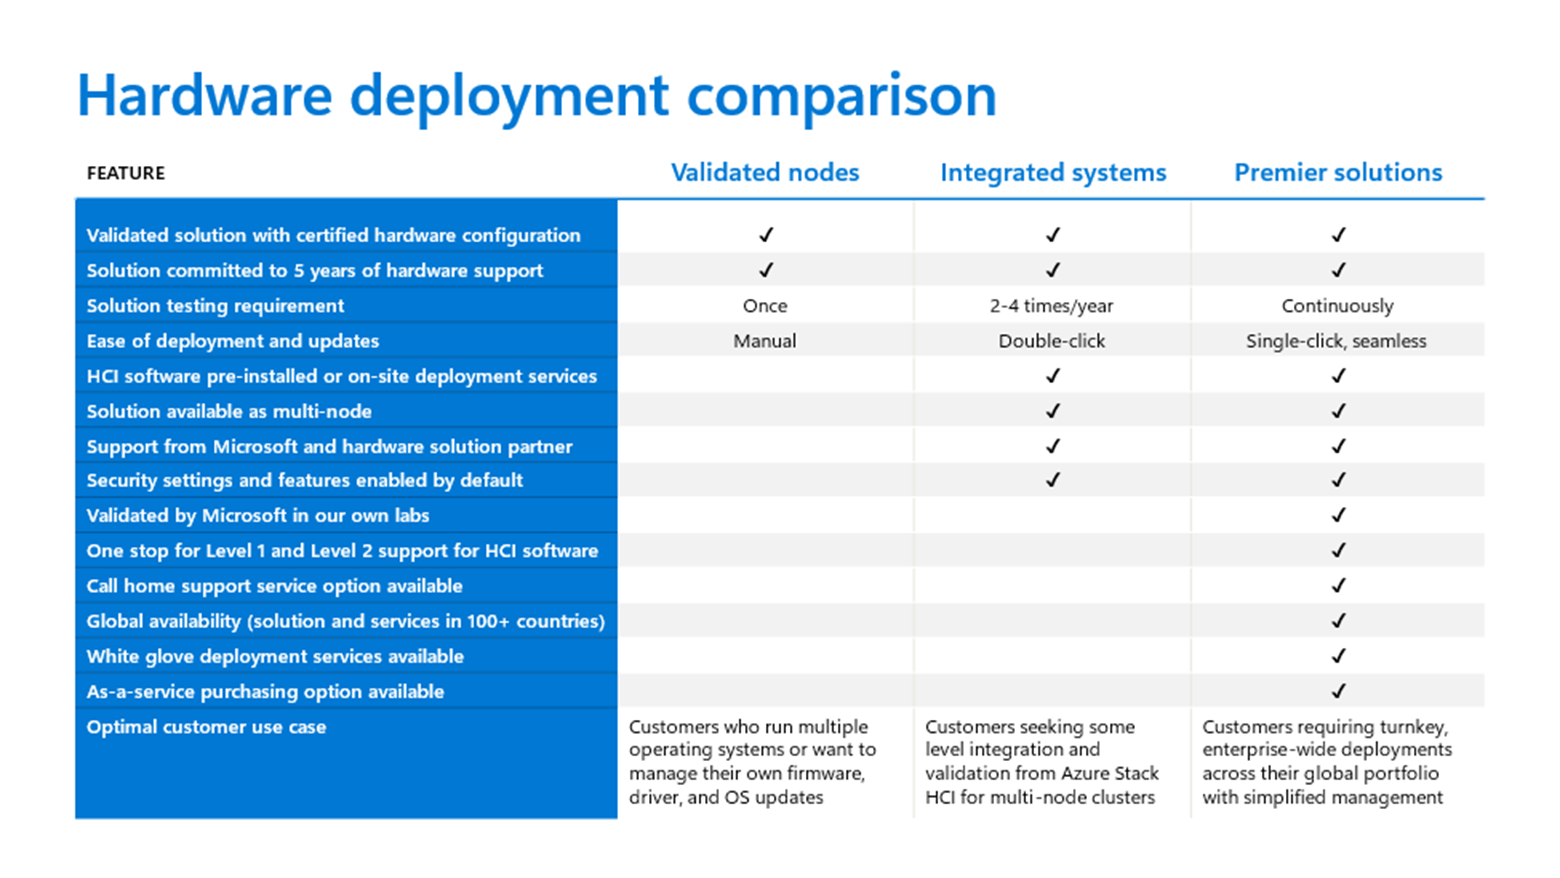
Validated Nodes
Integrated Systems
Premier Solutions
Validated nodes are the roll your own option for customers. The OEM has tested the hardware nodes and developed a driver package to work with Azure Local, making it available for customers to use. It’s supported by them. If you have an issue you’ll need them to troubleshoot it. The Integrated Systems are a step up and offer solution level support from Microsoft and the OEM with testing multiple times per year. There are also optional support and delivery services uplifts the OEMs will usually provide. The Premier Solutions are co-engineered with Microsoft and offer a bunch of coordinated service offerings, OPEX purchase options, and advanced capabilities. Pricing and budgets will increase, around 10-20% per tier list price, as you move to the right. Please check with your OEMs for detailed pricing information.
Detailed Azure Local Offering options
Going Rouge
It’s important to point out that Azure Local does not have any ability leverage existing or reuse existing hardware. Its greenfield only. Our OEMs have worked very hard to offer solutions aligned with the latest and greatest hardware capabilities available with Azure for CPUs, GPUs, and Disk performance of the VMs and other services you deploy across Azure Local and Azure public cloud. Mismatched capabilities often leads to a poor customer experience (and performance), which no one wants.
Sure, you CAN cobble something together if you have a vendor’s bill of materials for Azure Local, access to their firmware/drivers and pull down the image from the Azure portal, but it WILL bite you in a few ways. First, very few OEMs use or make available for customers their general CTO/BTO server SKUs for Azure Local. Most OEMs preload the OS onto the systems, level set the firmware for you, and configure optional firmware settings for an Azure Local deployment. In doing so, they typically publish different SKUs compared to the normal stuff you buy from them or get through a distributor. Even if it’s based off the same hardware platform. This causes a supportability mis-match when you put an Azure Local image on a normal server. The second issue is the config. Azure Local is a Hyperconverged solution which means specific NICs, storage controllers and discs in a very specific configuration chosen by the manufacturer were tested, validated, and approved by Microsoft. Trying to back into those selections is a hard road. Thirdly, the support matrix for Azure Local and Windows Server IS different making finding the compatible parts, firmware, and drivers much more difficult. CAN you do it? Sure. Will it be supported? Please check with your OEM before you start, but most likely No. So… that effort could be good for lab testing and kicking the tires, bad for production. That said, you can learn SO much from that Awful, Horrible, No Good, Very Bad path. Trust me.
GEEK warning! (Things are about to get VERY technical)
Origin Story
The Azure Local Hypervisor is an Azure Windows kernel branch specifically designed to deliver hyperconverged services for Compute, Storage and Networking. This is a Hyper-V based solution as almost all Azure solutions are. It uses mostly similar Failover Clustering, Storage Spaces Direct, and optionally Microsoft’s SDN stack found in Windows Server 2025. This is all derived from the original Microsoft WSSD reference architecture published for Windows Server 2016. That was the foundation for the very first Azure Stack products too. There have been a BUNCH of changes/enhancements/rationalizations since that initial architecture release.
Why is it important that this comes from an Azure branch vs say the Windows Server branch of the kernel if they use the same technologies?
There are a few reasons:
Azure dev cycles allow for more rapid enhancements than every couple of years for boxed products
We can decouple the OS build version from the feature capabilities and iterate
Azure support is provided with Azure solutions directly in the portal
Microsoft’s first pass at an Azure managed solution was called Azure Stack, later renamed Azure Stack Hub. It spawned a family of offerings culminating in Azure Stack HCI. Azure Local is an improved version of that product family. What we found with Azure Stack was customers needed greater velocity from us to enhance product capabilities. Faster even than every six months or a year. As a result, Microsoft has since moved away from the Windows Server and Client OS release cadence of Azure Stack HCI such as 21H2, 22H2, 23H2, etc. being the major releases. Those are still included from a Core OS perspective, but the solution enhancements are now done on Azure release train cadences of every few months. Similar to how the original Azure Stack (Hub) product is developed. You can go here to learn more about the changes: Azure Local, version 23H2 release information – Azure Local | Microsoft Learn
Back to the Future
The platform is being enhanced much more rapidly on this new release cadence. In fact, upgrading from an Azure Stack HCI releases like 22H2 to the current build moves you directly into the new Azure Local release train with all those new features. Also 23H2 and the Azure Local name change should be treated like a new version of the product by adopting this methodology. As a result, these enhancements will need to be adopted by your organization as the product evolves. This is a VERY different requirement than version changes to vSphere products. If that makes you uncomfortable, we completely understand. Adopting features at a fast clip can be jarring and require different testing and roll out plans. It’s worth the time to discuss this internally and decide if adopting change at the speed of Azure is right for your business. Here are some of the big things you’ll get in just over a years’ time if so:
Azure Local public roadmap – March 2025
Deployment
Azure Local is cloud deployed and managed from the start. Where Azure Stack HCI was connected to Azure as one of the final deployment steps. It’s not possible to run this product without connecting to Azure. The Azure Local deployment process is a set of ARM templates or an Azure portal based wizard experience that will build, validate, and deploy the infrastructure remotely. There’s a clear separation of the hardware deployment actions and the solution deployment actions. This allows greater flexibility and separation of roles for our customers.
All of the nodes will need to have an identical configuration. They will need to be installed, cabled, and powered on. Someone will connect to them and register with Azure Arc. Please don’t deviate from the documented deployment process. Installing Non-OEM 3rd party software on the hosts is not supported. In fact, outside of installing drivers and firmware or configuring a hostname, IP, DNS (proxy if required) and Azure Arc registration. Do nothing else locally. After the nodes show in Azure, you go straight into the deployment wizard to form the cluster. There’s a lot of flexibility in how you configure the networking topology and storage configuration. Many customers chose to replicate their vSphere node connectivity. Just know that the storage network should be redundant and it doesn’t need to have unique IPs or a gateway per cluster, but the broadcast (L2) space should be for one cluster only. Make sure not to get your wires crossed in the process! There are also built-in defaults available for security and storage to help first time users deploy in a secure and scalable solution.
Day 2 Operations
Management of the cluster and workloads can all be done within the Azure portal under the Arc landing page. We have a bunch of tools outside of just the deployment workflows though. We’ve integrated cluster management with Windows Admin Center (WAC) directly in the portal. We’ve connected Azure Update Manager with a cluster specific view which will perform a coordinated update process across the nodes to keep workloads running. We’ve worked with our OEMs to integrate their updates into those update workflows as well. You can also deploy VMs the same way you do within Azure (Portal, API, CLI and Automation) using Azure images to your own locations. You can manage those VMs directly within the portal as if they are Azure VMs (because they are, they run on an Azure platform). What isn’t able to be done today is cluster management operations via command line or programmatically within Azure Resource Manager (ARM). Those can be done interactively within the WAC, but if you want to automate something related to the cluster you’ll need to drop back to PowerShell or a PowerShell integrated automation tool, at least for the time being. This is being worked on, but it’s not available today. WAC within the Azure portal isn’t the only management option available. You can also deploy WAC locally for management should it be required. This can be helpful if your environment become disconnected from Azure. It’s the same web based experience just running locally. Don’t worry, all your running workloads will continue to operate without the cloud control plane. Azure Local can run disconnected from Azure for up to 30 days. SCVMM is also an option for our System Center customers to managed Azure Local. It offers scalable cluster management across a large number of Azure Local clusters.
Do’s and Don’ts
Another thing to note, Azure Local isn’t a product primarily targeted for datacenter virtualization or high concentration compute. The published maximum cluster size is 16 nodes. The practical limit, which is determined by our OEMs, is really around 6-8 nodes per cluster. The majority though are being deployed as 2-3 node clusters for point compute needs in edge locations or for appliance like workloads. Why 6-8 instead 16? It’s a matter of physics and money.
Almost all of these Azure Local clusters purchased today are deployed with NVME storage. The solution being a hyperconverged design where all the disks are managed by the CPUs in a pool across the cluster storage network fabric. NVME transmits data at PCIE speed replicating across a cluster disks in real-time. It makes the solution very performant, but with each node added, the network traffic increases exponentially. Throw in VM migration traffic between the nodes and network requirements can easily approach or exceed the limits of 100Gb ethernet with higher node counts. It can get expensive quickly. Microsoft has designed a lower cost option though, 2-4 Nodes can be directly connected without switches. This saves you money and network complexity. Azure Local also doesn’t support any SAN attached, SAS, or MPIO storage or perform any type of integrated SAN fabric management by default.
Another factor is management, the solution being Azure managed means there’s a management controller deployed automatically when the cluster is created. This controller is the same type used for SCVMM and vSphere, the Arc Resource Bridge. Today, there’s a 1:1 mapping for the ARB and Azure Local cluster resource. This creates a single island of management per cluster. It can be really good for remote or distributed sites, a little unwieldy within the datacenter.
As an example, consider a datacenter with 8-10 racks in a single row. You can fit two clusters in each rack or spread them across racks for redundancy. That would be up to 20 different Azure management endpoints per row! There are practical management limits at play here. This is the primary reason why we also support SCVMM as a management option for Azure Local.
So, if you don’t put Azure Local in a datacenter, where do you put it? The most common customer demand we see is for deployments outside of the datacenter. These would be small to medium size businesses, distribution centers, field offices, retail, manufacturing, and medical facilities are all good candidates. You CAN deploy in a datacenter, however it’s not intended to replace any existing datacenter virtualization layer. The most common use for datacenter deployments are Kubernetes clusters, VDI/DaaS workloads, IoT workloads, AI workloads and applications that need to live next to other system types that can’t leave the datacenter like Mainframes, Midframes and the like. In other words, contained use cases where you need a specific compute profile.
If you’ve made it this far congrats! I usually lose some players a few paragraphs back. If you decide that you want to try out Azure Local, what does that look like? The most direct path is to go here: Azure Arc Jumpstart: Azure Local HCIBox. This will give you the general look and feel that you can deploy today. You can also review the relevant documentation, release notes, and enhancements. Once you’ve kicked the tires a bit, reach out to your reseller, OEM rep, or Microsoft Partner to get started on the path.
Depending on the selections you make, installation services may be optional or included for your deployment. I highly recommend you take advantage of them. Implementation of a cloud controlled infrastructure is a VERY different thing than a VMware vSphere environment. There is a lot of planning required. Depending on your organization it could take a while to get the needed approvals for a purchase and working through the Azure endpoint requirements, setting up proxy exceptions, or Private Endpoint DNS configuration. There are also services in preview for Azure like the Azure Arc Gateway which can help, but those require configuration and planning also.
Just say no
A note on a VMware head-to-head evaluations. When we get requests for these, I actively avoid them. As do many others I know. Azure Local is a different animal than VMware Cloud Foundation (VCF) or standard vSphere. Sure, they both host VMs and Containers, can be had as an HCI configuration, and they are both offered through OEMs as a packaged solution. Walk like a Duck, talk like a Duck and all. That’s really where the similarities end though. This is all a matter of the perspective and history of each offering. VMware has spent decades perfecting the on-prem virtualization space. Differentiating themselves with a bunch of solution capabilities unique to them. There are tons of features it will have which Azure Local simply won’t. Microsoft has spent decades perfecting our cloud virtualization platform (Azure) and offering bundled virtualization capabilities with Windows Server Hyper-V. There’s tons of stuff we can do that VMware can’t. And, I know what you’re thinking, “Great, just give the list for each or product comparison matrix.” Unfortunately, there isn’t one. At least not one published by Microsoft. These products aren’t direct competitors. It really is an Apples and Oranges comparison.
I always encourage our customers to focus on business and hard technical requirements.
What do you need it to do?
How do you need it to perform?
Does it meet your resiliency needs?
Do the solutions meet those requirements?
What’s the CAPEX or OPEX cost to implement the solution?
How is it to manage?
How much of your environment is in the cloud or moving there soon?
We know you love VMware. That’s why it’s a successful product run by almost all of our customers. If your evaluation is for a feature-by-feature VMware replacement, I’ll save you a bunch of time. Azure Local won’t succeed. If you look at Azure Local as a cloud managed on-prem compute platform, it does that really well. It’s your business critical local compute for when everything else is moved to Azure.
The End
Seismic market shifts, like the one we’re in now, are an opportunity to re-evaluate the long-term solution strategy for your business. We think that Azure Local does a great job of helping our customers accelerate their transition to cloud while addressing those portions of the business which can’t be easily moved.
There are a whole set of other topics which come up after a customer decides to move down this path. How can I migrate my workloads, what are the costs involved, how can we move quickly with as little disruption as possible? Or alternatively, you convinced me that Azure Local isn’t quite right for me but how about that Hyper-V thing you guys used to talk about all the time? What does that path look like?
Those topics and a few others will be included in the next part of this series. Thanks so much for reading! I hope you found it valuable.
]]>Lee CoxVMware Migration Quest with Microsoft2025-02-28T15:37:59-06:002025-02-28T15:37:59-06:00https://leecox.pro/gbbcore/vmware-migration-quest-with-microsoftPart 1: The fastest path to victory
Your leaders are asking you to perform a miracle, but to do it you’ll have to embark on an ambitious quest. We know, you’re stuck between a rock and a hard place. The relationship is changing, and costs are rising. You’re trying to find a path forward for your existing environment.
So, what are your options with Microsoft? Luckily, you have a bunch of different ways to skin this particular dragon. The first step in any direction is to assess the terrain. Where are you now and what tools do you have at your disposal without spending any gold? Free loot will always beat merchant bought when it comes to solutions. This goes for software, hardware, human resources, and swords. Take stock of what you’re running, where, and how long you need to operate it.
You can’t find a solution without first understanding what the goal should be. You need a plan your journey. The first part of a good plan is to understand your organizational goals, needs and requirements. What does victory look like when you get to the end? Start with that and work backwards. The solutions and technologies selected will be support characters (NPCs) in your party along your VMware Migration Quest. And you can’t start a quest without some good music!
Is there stuff you’ve been putting off? You know, things that you just never got around to taking care of? A bunch of tools and materials you never cleared out weighing you down? I find when I need to do one big thing, it’s always better to find a way to do three or more smaller ones at the same time. The payoff is bigger, and the value is greater. So, look around your organization for all those extra things and put them on the board. Work in as many as you can to sweeten the pot. Don’t let them turn into long boring sidequests though.
Do you need to decommission systems?
Co-location or DR contracts that you need to evaluate?
Is there planned spending for a hardware refresh you can reallocate?
Rationalizing the organization’s needs and determining what can, should, or shouldn’t be moved is a great first step. Once you have a handle on that, start looking at the hard/soft dates you need to transition. Can you run without support for your perpetual licenses or purchase 3rd Party support as a bridge? This will build out the roadmap and you can layer resourcing on top.
Also, this can’t be understated, the best migration/transition is the one you don’t have to make. So, what’s the number? What is the company willing to accept to keep the status quo? It can’t just be a few % less than the current renewal, or maybe it can. Take some time and have the discussion internally to understand if you’re willing to continue the relationship now that it’s evolving. If you are, great! That’s the right decision for your organization. Trust me, we won’t be upset. We’ll probably NEVER know. It will be very difficult to capture and hold the attention of any technology partner who may feel as though you’re just going through the motions. We do see these situations quite often and we talk to our account teams about customer commitment as a qualifying factor for engagement and investment.
Up to now, I’ve sounded like a therapist (and MMORG player), I KNOW. There’s a good reason for it. A lot of customers we talk to are reacting to a vendor relationship going sour. We see them go through the stages of grief in real-time. Microsoft needs to know what that Acceptance stage looks like for your company and so do you. Once that is known, we can have a VERY productive conversation about the options available.
We often recommend starting discussions with business owners and technical stakeholders in a workshop, Innovation Hub or EBC session, to understand the objectives, requirements, and help educate us on your estate. Sometimes there’s resistance to this because it requires time from us and you. In other words, commitment! It can be difficult to make time investments if you’re unsure of the path. If this level of engagement is too much for any reason, it can be informative on its own. You can save a bunch of time by cutting that check to Broadcom and going about your day.
If you do choose to spend that time with us, thank you! We’ll start by understanding your needs, goals and business outcomes. This will usually involve an assessment and connecting a few systems, like your vCenter instance, into a tool we call Azure Migrate. Then we’ll start looking at the data along with an RVTools export to understand the current state for planning the migration. There are a few different primary paths the conversation can go down and one or more solutions may be the right answer for your specific needs and goals.
Choosing a path for the journey
Microsoft has made significant investments in our public cloud platform, Azure, to deliver the best-in-class experience for our customers. We’ve delivered identity, management, monitoring, security, and automation for operating and moving your workload quickly and efficiently into the cloud. These investments help to deliver tangible business and operational advantages for our customers compared to continuing to run their environment on their own. They include using an orchestrator and API driven platform called Azure Resource Manager to collect various services and deploy them through a template based system.
The declarative nature of the platform allows customers to move quickly, working in minutes and hours what used to take weeks and months. Time is money as they say. You can also respond in a more dynamic way with the service capacity in Azure. Instead of planning for peak usage, you can plan for temporary additional capacity. Allowing you to right size the workload for the business instead of planning for the worst. This is why rationalization that I mentioned previously is so important. If not done, you end up running the same as before with a bigger bill. Azure also frees up valuable time for your resources to focus on business needs instead of physical plant MAC activities. Azure is an Always on Programmable Infrastructure with millions of combinations.
There’s also a bunch of great ways to get started with Azure leveraging the power of our Azure Landing Zones and Cloud Adoption Frameworks to get started and scale. Now, let’s look at some of the solution options available for this VMware Migration Quest.
Pros: Fastest Solution Deployment and Migration Path
Cons: No workload modernization and limited hardware configurations
The first option on our journey is the fastest path to value. An as-is move into Azure with Azure VMware Solution. It’s like taking a portal to a part of the game you’ve already played and knowing all the best places to level up and get to loot. It’s a straightforward and efficient way to migrate your existing environment without much of a lift. It requires a few steps in the portal to deploy the infrastructure, usually within a few hours. It will spin up a VMware vSphere environment with the required number of ESXi nodes, vSAN, vCenter, and NSX-T. From there, you get to use all the tools you know and love from VMware to replicate the VMs into your new AVS cluster(s).
Your account team will likely engage an SME in the service to help you understand the sizing options, vSphere services available, and provide a consumption estimate from the Azure Pricing Calculator to help you get an idea of the service cost. The more detail you provide, the better we can estimate so please engage in as much detail as possible. No one likes going into a conversation expecting X price and then being surprised with Y price as the conversation evolves and things get added.
Your account team and the Azure Specialist will go over things like the recommended over-subscription rate for the solution, reserved instances, and rationalization all to help you maximize the usage and minimize the cost.
We have many customers who choose to go down this path. Especially if they can move their entire VMware environment. It’s business as usual with Azure as your datacenter. There is a lot of value that can been driven once those workloads are in Azure with our other Azure services like AI, Security, and PaaS offerings. We see a lot of customers start to move components into other Azure services once they are running on AVS to further optimize. It’s a smoother transition if all the data is in the same place on the same network.
Pros: Limitless hardware options and granular cost controls
Cons: No workload modernization and slower migration time
The next path is a direct migration to Azure IaaS infrastructure. You can start on this path now in the Azure portal through our free Azure Migrate service. Simply click the Icon and start your first project. You’ll need to deploy the data collector, then it will ingest a lot of information from your vSphere environment. Once the data collection is up and running you can build detailed assessments to determine the cost, size, and tools to make a move into Azure IaaS VMs.
We see a few customers choose the IaaS path if they have specific requirements which aren’t met within AVS. Maybe you need ARM VMs, a bunch of Blob storage, direct access to GPUs, or Scale Sets. You may want to take advantage of best-in-class solutions like Azure Kubernetes Service moving off Tanzu. Things like those would fall outside of standard AVS deployments. Those workloads can still be moved into Azure; you’ll just migrate them into Azure directly vs running within vSphere. That’s the power and flexibility with using Azure vs running on-prem. All of this comes on a single monthly bill.
Pros: Low overhead for workload deployment and lowest cost
Cons: Resource intensive to refactor applications and less flexible than IaaS
If you’re willing to do some additional leg work and shed the hypervisor layer completely. Customers can further optimize their environments by looking at any number of our PaaS services. Azure Migrate will make recommendations and provide you with options for some of these also. You can use Azure SQL MI, Azure App Services, Azure Fabric, AI or IoT solutions. These are for those workloads which are well understood and documented within your organization. Not everything can go down this path for a variety of reasons, but we do see customers skip the IaaS steps and go straight to PaaS services for the right workloads. The big contributor to success here is availability, timing, data and skills. Refactoring an application isn’t for the faint of heart even in the best of times… and these aren’t those times.
It’s all about the timing…
If you need to get off your existing VMware licensing in say less than 6 months, then AVS is really the best bet. We’ve seen some VERY motivated customers move even faster. If you have more time, at least 6-12 months to pilot, plan and test. Then you might consider a set of IaaS or even PaaS services to run some of your applications. There isn’t one right answer here and it depends on your specific environment and requirements. You can take a mixed approach as time allows. Moving the big rocks, purchasing a fixed amount with additional capacity bolted on that will sunset is also an option if time allows.
These are the short paths to victory. Azure is a set of ready-made solutions to help you along the way. You know the old saying, “You can have it Fast, Cheap, or Easy. Pick two.” That very much applies here as well for the different solution options. Azure has some very cool cost-saving features for our customers. We offer discounts for Azure commitments, Reserved Instances, Savings Plans, Azure Hybrid Benefits, pricing and estimating tools with our Azure Pricing Calculator, Azure Migrate and built-in cost analysis tooling within your subscriptions to help control your spending. Reach out to your Microsoft Account Team to learn more.
I hope this first part of the series has helped you understand the quickest way to get to the end goal of your VMware Migration Quest. There’s a lot in here and a lot of ground covered. We do know that cloud won’t always be an option for everyone or every workload. In the next part, we’ll discuss our Adaptive Cloud options that exist outside of Azure and how Microsoft can help there too. There are several ways you can win the day and emerge victoriously. You might just have to pick your battles along the way!
Thanks for reading!
]]>Lee CoxRoll your own AVD on HCI deployment – Part 4: Turn it up!2024-04-01T14:54:02-05:002024-04-01T14:54:02-05:00https://leecox.pro/gbbcore/roll-your-own-avd-on-hci-deployment-part-4-turn-it-upLee Cox – Advanced Migration GBB
Welcome back to Part 4 of our Blog series. Thanks for taking the time to follow along. So? How did it go? Did you get through the whole thing with only one pass? I know I didn’t… 😉
Post-Deployment Shenanigans
Once you are done, you’ll have a bunch of new elements within your Resource Group. Here’s an idea of what it should look like:
The HCICluster element is your main player from now on. He’s got all the goods on the nodes, storage, and where you can go to get monitoring info and performance stats. There are a few things to do here so let’s click on him and go for a tour!
Go into Windows Admin Center and deploy the Admin Center Extension to enable that feature. Super handy for cluster management, real time reporting metrics, and networking/storage config. It will take a while for it to deploy the Extensions and enable the feature.
Next lets go back to the main Cluster blade and select VM Images. VM Images is the local repository for VM disk images we want to deploy from on the HCI Cluster.
Now we want to select Add VM Image. Here we can add Images from several places. The most common is the Marketplace, but if you have custom images in your Azure environment or on a local file share you can add those here too. Just remember these images need to be compatible with Azure to be useful. You can always pull-down one from the Marketplace and customize it for your needs then save that for reuse.
After you’ve added a few images to the system, say Windows Server 2022 Azure edition and Windows 11 with M365 from the Azure Marketplace they will show as images you can select in the VM deployment flow.
After adding the images and letting the rest of the deployments complete, you should now be able to connect to Windows Admin Center. Let’s go there and click Connect. Once the “WAC” interface loads up navigate down the left-hand side to the Network ATC option and Click on Deploy Network ATC Network HUD. This lets us see and manipulate the Network Intents we defined when we deployed. This will take a few seconds but once done you should see all the network interfaces and intents they are deployed on:
Ensure that the proper interfaces are matching the correct intent on the servers. Also, make note of the Compute Virtual Switch name for later!
Next, I go into the cluster Settings then to Storage Spaces and pools and I select Thin for the default provisioning type. This will reduce the storage consumption on the S2D Volumes for the VMs deployed.
Finally, I’ll check the Updates area on the cluster, and Enable Cluster Aware Updating. Once I’m finished up in here, I’ll drop back to the main HCI Cluster Blade and leave WAC.
Now, select Logical Networks on the left-hand side and define one. On my home network, I have a predefined DHCP scope deployed already so I selected that to be my network in the HCI environment.
Very quick to setup a DHCP Logical Network. Nothing to enter! Except! That Virtual switch name from WAC – Network Intents page, yes the whole weird thing the deployment named it. Some of the services you can deploy onto your new HCI environment do require a DHCP Logical Network.
Next, go down to the Operations section and select Updates
If when you get into the Azure Update Manager area, there are no pending updates then you’re done! It will look something like this:
If however, it looks like this:
Then you select One-time update and step through the wizard to complete the install.
Here we have a completed monthly update of the system.
After you’ve run through and completed the updates to the system, you’re done with the Day 1 and 2 activities to deploy the Azure Stack HCI solution. Woohoo! Now we can start deploying VMs and Services onto the cluster!
Deploying AVD on HCI
We’ve had a “bit” of work getting here, but our cluster is now humming along and ready to accept Azure services! You can deploy regular VMs, AKS on HCI, and AVD on HCI right out of the box with some minor config. Arc enabled services can be layered on top of AKS for PaaS DB, App, AI/ML solutions as well.
Given that I work with AVD on a regular basis, I thought I’d cover what that deployment experience is like with the HCI. Azure Stack HCI can run the host pool for the Azure Virtual Desktop solution. One critical point to make here is the control place for AVD is still hosted in Azure. You can however use RDP Shortpath to have local users direct connect to the session host over UDP on HCI after authentication and authorization through the AVD control plane in Azure.
There are a few prerequisites here to point out that are important to understanding how AVD on Azure Stack HCI runs:
You need a Hybrid Identity Setup with EntraID federated to your on-prem host pool AD environment. Today, AVD on HCI doesn’t support EntraID Only joined domain hosts. However, if you remember all the way back at the beginning where I proposed the idea of a Fabric Identity, you aren’t limited to the domain used to deploy HCI. As I mentioned then, the HCI cluster identity and the workload identity can be separate domains. So, your user identity space can be the one you deploy with AVD.
Azure Stack HCI and the AVD Host Pool must be registered within the same EntraID tenant. I know this will be confusing based on the first one but hang with me. Azure Arc underpins all of this, and Arc resources can be registered with ANY EntraID tenant. The local identity and the cloud identity are separate things with Azure Arc. So, while your local HCI cluster might be on azurestack.local AD domain, and your users might be on contoso.com. Your EntraID cloud identity domain might need to be hybrid joined to contoso.com, if that’s your User domain. The azurestack.local isn’t connected to anything at all, but we have registered the HCI hosts into Azure Arc within an EntraID tenant. Your AVD Host Pool that gets deployed onto the target cluster needs to be in the same Tenant of contoso.onmicrosoft.com and in the same subscription.
See this graphic below to help illustrate:
Here you can see your AVD Host Pool VMs are connected into the AD Domain contoso.com which is Hybrid Connected to EntraID tenant contoso.onmicrosoft.com. Your HCI nodes are connected into azurestack.local AD domain and are also registered into your subscription under contoso.onmicrosoft.com EntraID Tenant as well. Now, you don’t have to deploy it this way. Your Fabric domain and User Domain can be the same. But if you need this level of sophistication, it’s possible.
You need to have a Windows Server 2022 or Windows 10/11 Image deployed to the HCI cluster to deploy the Session Host Pool. (Remember from above?)
You need to deploy a Logical Network with DHCP to create session hosts today. (We did this one too!)
You can verify that your HCI Cluster is prepared and meets the AVD Requirements by going to the HCI Cluster element in the Portal and looking under the Getting Started section.
If you have the green check mark, you’re good to go. (Provided you’ve connected the workload/user identity domain to EntraID as explained above, this checker won’t validate that given the complexity.) If you have a red X, then click on the hyperlink and see what you’re missing.
Let’s select Deploy to go to the AVD Host Pool deployment wizard. It will open a new browser window and authenticate you.
Right away you’ll see that the deployment experience for AVD on HCI is the same as any Host Pool creation flow.
Select the relevant parameters for your environment and then select Next: Virtual Machines
This part of the deployment is where we diverge from a standard AVD deployment. Select the radio button to “Add virtual machines” Yes.
Complete the rest of the required information to perform an Azure Stack HCI deployment by making selections and scrolling to the bottom of the screen:
Give the VMs a Prefix name: IE AVD, POOL, etc…
Tick the radio button for Azure Stack HCI virtual machine
Select the HCI Cluster Customer Location
Select an Image (or if you didn’t add one yet, add one!)
Specify the VM configuration you want on the HCI cluster and the number of VMs to deploy.
It’s worth pausing here to mention this will impact cost. VMs are meter at .01 per vCPU per hour or 7.30/month roughly. So for the example below that has 3 VMs with 4 vCPUs per, it’s almost $90/Month at list price.
Also, if you’d like to make your life easy, line up the VM config to Azure based VMs from the same CPU family. It will help with performance expectations of your users. Below that’s roughly a D4s v3 with the Broadwell based gear I’m deploying onto.
Specify the Logical Network you defined with DHCP previously. (You did that right?)
Provide the Active Directory environment you want the HCI VMs to join. Remember no EntraID only!
The User Account needs to be able to connect to domain and add systems.
The DHCP scope needs to refer to the proper DNS for the Domain to reach it.
If you want to specific the OU to drop the hosts into that information it needs to be in the proper format without “quotes”.
Finally define the local admin information for the VMs with a password and click Next: Workspace
Here click, the radio button to add the VMs into a default desktop application group, then either create a workspace or select an existing one. Once done, click Next: Advanced at the bottom.
Enable diagnostics if you like and select a workspace to send the data if you so choose. Then click Next: Tags to continue.
Add relevant tags and information here for the resources the deployment wizard will create if needed. Then finally click Review + create.
The validation should come back good if you’ve provided all the required information. This process will take a while. Don’t forget to download the template should you need to redeploy or add it to your Automation workflows for the future!
The deployment might fail due to resource constraints, missing or incorrect domain information, and exhausted DHCP scope, missing DNS info for the VMs to pick up domain info. Point being there may be some troubleshooting to get a successful deployment. Give it a few tries, dig into the logs and generally bang it out.
Once Azure Resource Manager notifies you the deployment is complete, you should see the VMs under the HCI VM list:
And the AVD Control Plane within Host Pools:
Here you can see I have two Hosts running on my cluster and they show in the AVD Host Pool. They are deployed to my Fabric Identity. I’m only using this for testing and due to the quirk of me deploying into a Microsoft Corporate tenant, I can’t actually Hybrid connect to the EntraID tenant. So, this is good to see the deployment workflow functions, but otherwise may not be representative of your environment requirements.
From here, you also can go through the process of deploying the Remote Desktop App or the Windows App from the Microsoft Store. The Windows App is the new unified client for all RDP connections.
Once you download it, just sign into the App with the EntraID connected to the Host Pool environment and you’ll see the Workspace assigned with the Desktop or published RemoteApps.
That’s all you have to do to start hosting the AVD workload on Azure Stack HCI!
Final Thoughts
We’ve reached the end of this series. We built an environment from the ground up and deployed a workload to the on-prem cluster. There is a lot more you can test and validate outside of the AVD on HCI solution with Azure Stack HCI.
Here are a few thoughts around cost optimizations with Azure Stack HCI in a Test/Dev environment. While Azure Stack HCI has an entitlement to use Azure Hybrid Use Benefit to exchanging physical cores of Windows Server Datacenter licensing with SA and for Azure Stack HCI consumption-based cores. It isn’t always efficient to use that on an environment like this. You do have a 60 day free trial from the time you register the cluster. You also have the ability to join the Preview Channel for the HCI system builds to get the latest versions. Since Preview Channel systems can’t be used in production, and these nodes aren’t production ready either give the old/obsolete nature of the gear, those two seem to pair up nicely. I won’t go into the workload licensing here as that too still needs to be entitled, but you have a few options to run this solution for a while and kick the tires. Then decomm it again or recycle it as you see fit. If you’ve collected all your work, you can even replay that on more gear later or get a jump start on a production build working with your OEM of choice. (You DO remember you can’t run this in production, right?)
I hope that you found this blog series helpful and insightful on how to stand-up Azure Stack HCI and get a service deployed. It’s several hours of work to roll your own HCI environment, but you’ll have a nice understanding of the fundamentals and a greater appreciation of all the work that went into the automated HCIBox virtual environment we’ve built into the portal. There are plenty of OEM solution offers to leverage once you’re ready to scale. Having a test environment like what we built will help you clear the path on all the environmental challenges to operationalize Azure Stack HCI.
Which brings us back to the beginning. If all this work doesn’t seem worthwhile, you can always leverage the other test/deployment methods available for HCI. You can and should work with an OEM to get a cluster environment with services for your initial deployment. This blog series is for when all of the other paths won’t meet your use case, budget, timeline. I want to again thank all of those who helped to put this together. Whether that was excellent existing documentation, sorely needed collaboration building my environment, or outstanding peer review of the posts. Thanks to: Michael Godfrey, Thomas Maurer, Flo Fox, and Kevin Sullivan I couldn’t have done this without them!
And thank you so much for choosing to spend your time here!
]]>Lee CoxRoll your own AVD on HCI deployment – Part 3: The Deployment2024-03-29T12:33:15-05:002024-03-29T12:33:15-05:00https://leecox.pro/gbbcore/roll-your-own-avd-on-hci-deployment-part-3-the-deploymentLee Cox – Advanced Migration GBB
Welcome to Part 3 of this series of Rolling your own Azure Stack HCI environment! Congrats and thanks for sticking with me. Today is the day! We’re finally here. Now we get to load some code and make this HCI “thing” happen.
Let’s review what you should have done at this point.
We’ve prepped the hardware with the latest firmware.
We’ve collected and injected drivers into the 23H2 HCI build.
We’ve created/prepped the on-prem and cloud identity space, rights assignments, and users.
That’s a lot, it isn’t a trivial amount of work and lays the foundation for a straightforward installation process. Well, as straightforward as it can be using unapproved hardware for a Dev/Test solution environment. 🙂
The steps here are the same-ish as what you did to install Windows Server 2022.
Power off the systems
Insert your USB Key with HCI on it into the USB port
Power on the system and one time boot to the USB key
Tell the setup process to install the HCI image
Selecting “Custom” install process so we can clean the drives
Delete all the existing partitions on the OS drive and select “New”
Continue the install process
Wait…
Wait Some more
Set a local Administrator password across the systems – (Be mindful of Complexity Requirements)
Then boot into Sconfig for a few more changes
You’ll be greeted by this lovely screen when you drop into the “Desktop” on the HCI server:
When we get here, go into 2 and set the proper node name. When it asks to reboot, say no.
Then go into 8 and verify you have IP information if you’re running DHCP (which you should have a scope for on your network). Set the Static IP and DNS Server of your Domain Controller here.
Go into 9 and verify a time source. It should match your domain controller.
I then do other housekeeping for the systems:
Enable RDP
Enable Required Telemetry
Then go into 6 and Install All Quality Updates
Once the updates are done, you’ll reboot and rerun the updates. There may be driver updates in here too.
When the system stops installing updates and requiring a reboot, you have a few options here based on what you know of your hardware. You can select 15 and drop into the command line, navigate to your driver folder on the USB key and load any additional software or drivers that didn’t slipstream. If you’re not sure, you can load up a Windows Admin Center instance and import the servers with the Administrator user account on the system, then go into Devices to see if there are any “Unknown” devices without drivers in the list. This is like going into the Device Manager on a regular Windows system. It also only takes a few minutes to setup. Then use the PowerShell interface within Windows Admin Center to load up the additional software and drivers.
On my system I needed to install the iLo Drivers and config software for the OS to correctly interface with the hardware. Other OEMs have similar requirements with Dell/EMC, Lenovo, Cisco, DataOn, Intel etc.
Once you’re done with these steps, you should replay the work on any other nodes in the same order to get the same end result. You can do all this work in the OOB interface, RDP, or WAC. Whatever makes you feel comfortable.
Depending on how many interfaces you’ve connected and plan to provision, what you plan to use on the system, and what it was used for before, there are a few side quests you may need to complete.
Clean Your Disks: As mentioned previously we need data disks for this to work. Mine were used in a vSAN configuration and I needed to clean them to use with S2D. You’ll need to remove any removable media from the system first. Here is a script to run on each node:
Config the NICs: If you’re using more than one Interface card for your VM/Management traffic, which is pretty standard, you’ll need to disable DHCP on the other interfaces and remove the gateway. Here is some code to do that:
You’ll need to set the interface names and “-NextHop” address to the correct ones for your interfaces/network.
After you get done here, it’s worth looking over your work and making sure you’ve got everything squared away. Before the next few steps. Everything should be up to date on HCI, drivers deployed, IP’ed, Network Interfaces properly connected/configured, Disks prepped. If you’re doing a switchless configuration, make sure your ethernet or DAC cables are connected to the same interface and port on both sides; Port 1 to Port 1, Port 2 to Port 2.
You’ll want to deploy the Server Roles for HCI and reboot:
We’ve now got all the nodes ready to join the team and work for Azure! Woohoo! There is an onboarding script that you can use below. Replace the sample information with your own for the variables.
You’ll be prompted to sign-in to a system that has access to a browser and provide the device code. Good to do this step through RDP to copy/paste or in WAC. You’ll see a bunch of code scroll by and the systems will be connected to Azure through the Arc agent.
Once complete, Let’s verify the config and the hardware before finishing the local side of the config. Run:
Invoke-AzStackHciHardwareValidation
Look for any errors in the system setup and follow the information in the error to resolve the issue.
We’re now done with the nodes local configuration everything else can be done through Azure! Please note that if you purchase an Azure Stack HCI system from an OEM, all of this work is done for you. They’ll also walk you through the Azure and AD prep steps.
In the Azure Portal, search for Azure Stack HCI and select it like we did before.
This time we want to select “Deploy Cluster” on the HCI landing page.
Now we’ll land on the deployment wizard for Azure Stack HCI 23H2. It’s all portal driven and will then direct the Arc connected HCI nodes to complete the cluster build. You should see your Arc connected HCI nodes at the bottom. If you don’t, then they didn’t register correctly, or you tried to deploy and the need to clean up the install.
In the next set of steps, you’ll set and specify a bunch of information that was outlined during the planning and identity phase of this series. Remember when I said it would be a good idea to write things down? Yeah, this is where it gets used. Ensure you have the correct nodes and the right number of nodes before continuing. All of your information you enter is critically important, but the process is also forgiving.
Tip: If there is a circled “i” next to a field, hover over it or click it to reveal the field tip. These can either be not helpful or very helpful to make sure you enter the information correctly. I always click on them the first time through a wizard like this.
You should define a new Key Vault, Storage Account, and anything else that requires new/other Azure services. You’re going to setup the Network Intents here with the interface mapping. You’ll want to set any VLAN IDs you might need for the networks like storage or VM traffic. You’ll need that block of IPs we were discussing before to deploy the clusters and configure the services we’ll run on HCI.
You need the Local Admin information, the Domain Information, and the User Account you had the AD Prep tool create in the previous blog. The OU info needs to be in the same format from the AD Prep tool.
The final set of steps relates to security recommendations (good to accept the defaults if you can), storage config (let it create the recommended volumes if the config is typical), and tags (Tagging the environment will help with locating resources).
Finally, the wizard will check your work for any errors:
And then click Start Validation to run checks on the systems to ensure it can deploy properly.
If at this step it runs into issues it will give you “Go Do’s” to correct before continuing. If you do get an error, the system will allow you to revalidate.
Finally, you’ll be given the option to “Review + Create” where it will start the cluster build. It will also allow you to save the ARM template of the deployment for you to replay or create a template from for future deployments.
The deployment WILL take a while. Up to 2-3 hours for a two-node cluster. So let it do its thing. You can monitor the deployment from the final step which will take you to the deployments section of the HCICluster element:
If at any point it fails, you can Rerun deployment to pick up where you left off.
This is a good place to pause for now. Get the Cluster up and running address anything that comes up like typos and any issues. I had a permission issue from not getting the rights correct on the Domain User account, entering the OU structure incorrectly, along with the User information being formatted incorrectly my first time through. It’s important to pay attention to the sample information that is provided and the field tips.
Once you clear all of those common errors, you’ll be able to move on the next set of steps to get this turned up! I want to say thanks again to Michael Godfrey for the scripting samples here. Thanks for reading!
]]>Lee CoxRoll your own AVD on HCI deployment – Part 2: The Plan & Identity2024-03-28T12:10:37-05:002024-03-28T12:10:37-05:00https://leecox.pro/gbbcore/roll-your-own-avd-on-hci-deployment-part-2-the-plan-identityLee Cox – Advanced Migration GBB
Welcome back, and to Part 2 of this series. I hope that you found the first part helpful. Continuing on from the last Blog post you should have a few things sorted out now to begin our next set of deployment steps.
You should have your hardware up to date with the latest available firmware.
The hardware should be set for TPM, SecureBoot, and the storage controller in IT mode (if required).
You should have a USB Key with the latest version of Azure Stack HCI 23H2 and the Driver/Software folder you created earlier on the root of the drive.
Planning
Now is a good time to pause and recommend that you take some time to plan the environment you’re going to deploy. As they say, “Failing to make a plan…” Seriously, you need to make a few decisions with regard to structure of the solution in order to know how all this will play out. You need to understand the infrastructure network space your HCI servers will live in:
How will they communicate with each other?
Are there VLANs and/or Firewalls involved?
What is the AD Domain you’ll connect to?
Will you need to use a Proxy to talk to Azure?
Private Endpoints?
What naming convention will you use for the systems, cluster, users?
Taking a few minutes (or more than a few) to review the network requirements. Documenting your config goes a long way in troubleshooting things later. I typically start a OneNote or Notepad doc and write down as much as I can as I go and refer to it later as needed. You can find the Network Requirements for HCI here: Physical network requirements for Azure Stack HCI – Azure Stack HCI | Microsoft Learn But, this is just the tip of the iceberg. There is a bunch you can get lost in with this aspect of the documentation. I’m still trying to find my way out! My best advice is understand the physical topology of the environment, then look at the deployment options for the number of nodes you have referenced in the docs. Then look at the IP requirements for your chosen pattern.
I have a co-worker Kevin who loves to say Firewalls, Firewalls, Firewalls. If there’s an issue with a hybrid or “Adaptive Cloud” solution, it’s almost always firewalls. So, have a look here: Firewall requirements for Azure Stack HCI – Azure Stack HCI | Microsoft Learn and make sure you can reach the endpoints, refer your NetSec team here too and discuss if these would be an issue. Most are common and known Microsoft endpoints but it’s helpful to be proactive. Another great tool that has been developed is the Environment Checker tool, Microsoft has spent a bunch of time making sure the Hybrid connectivity can be successful. You can use this: Use Azure Stack HCI Environment Checker to assess deployment readiness for Azure Stack HCI, version 23H2. – Azure Stack HCI | Microsoft Learn to make sure your network is ready to talk to Azure, if the Hardware is up to snuff, can the nodes talk to AD or Arc endpoints and the ports are open for all the needed traffic.
In order to deploy an HCI infrastructure, you need 1 IP address per server, plus a minimum of 6 additional contiguous IPs for infrastructure that will be deployed during the cluster creation process. The first consumed will be the Cluster IP, the rest are various Failover Cluster services that will also be deployed within the solution. You may also need IPs for OOB management nics and IPs for a Domain controller or two if you are building a net new environment.
Azure Stack HCI 23H2 changes the installation and cluster deployment process compared to earlier versions. In the past, you would build everything on-prem and register the cluster as a final step. Today, you install the hypervisor and do some minor personalization config, then you register the system with Azure Arc BEFORE you form the cluster, join the domain, etc… Azure will do those steps for you. It’s a BIG improvement over the old way and handles a bunch of steps for you. You should have all of these design decisions made before you move on. Write it all down! You will need it to go through the wizard later.
Active Directory
Also, with the release of 23H2, there is now a defined method of organizing your on-prem Active Directory environment resources and a PowerShell tool to help with the deployment. Let’s start there. You should have an AD environment running. This is a Prerequisite to get Azure Stack HCI going. If you’re uncomfortable adding this solution to your existing AD Domain, you can stand one up just for Azure Stack HCI. Flo Fox has written a great blog post on the concept of Fabric Identity here: Why You Should Have a Fabric Domain and Network for Azure Stack HCI (petri.com)
The AD environment doesn’t have to be hybrid connected to EntraID to serve the needs of Azure Stack HCI. It’s used for the on-prem server identity space and the Failover Cluster configuration. Once you have the AD environment identified, we need to run the PowerShell utility to prep the environment. You should run this on a system that has access to the Active Directory environment. This wouldn’t be one of the HCI nodes, at least not yet. You can run it on a domain controller if that’s all you have. You also need to have a user account that can create an OU and User Accounts. You can pull down the PowerShell module by going to the command line and typing:
Once you have the PowerShell module, now you need to decide what you want your OU name to be and Username. The Username should be JUST the name not a domain context as you’re already signed in to run the tool. Here is some handy code to get the objects created:
Tip: If you’re Password requires the $ symbol use ‘single’ hashes instead of “quotes”.
You can validate the Domain Prep and configuration was successful by looking at the OU and User Account in Active Directory Users and Computers admin tool.
In the OU, right click go into Properties and verify that Block Inheritance was enabled.
Once you have a successful result, you’ve completed the required steps to prep the on-prem domain. Yay! You did it! High Five. See that wasn’t so bad. Now we can move on to the EntraID and Azure Subscription steps to prepare the cloud side of the deployment.
Azure
Login to the Azure Portal, if you’re using a dedicated EntraID tenant for your test environment you can switch to the right one in the upper right-hand side by selecting your username.
The EntraID tenant you are currently in will be shown under your account. If this is correct, great! If not, click your user account and select the correct one. Also, while you’re in here click the Star next to the Tenant to make your default on sign-in and see at the top what the default subscription is at the top. If it’s the one you’re working with great! If not, you’ll need to change that later.
Now, select the subscription under the EntraID tenant you intend to use for your HCI environment. In order to make the subscription and EntraID changes, you’ll need the rights within both to properly complete the steps. If you don’t have Owner/Contributor rights to the subscription or Admin rights within the EntraID you’ll need to work with someone who does or have them granted to you.
We need to register Resource Providers into the Subscription to allow resources to be created. This only has to be done once per subscription. The most straightforward way to do this is within the Subscription element itself.
Type in Subscription within the search box, navigate to the list of subscriptions, select the one you are using. Then within the Subscription blade scroll down on the left side to Resource Providers:
You’ll want to register the following RPs:
Microsoft.HybridCompute
Microsoft.GuestConfiguration
Microsoft.HybridConnectivity
Microsoft.AzureStackHCI
Select the RPs then click Register at the top. You don’t have to wait for this to complete. Azure Resource Manager is multithreaded and will work on each one until complete. You’ll need rights to do this in the subscription. Typically, Contributor is enough.
While you’re in the subscription, also assign yourself a couple of permissions in IAM. Scroll up select IAM –> Click “Add+” in the top left corner of the blade. Then select Add Role Assignment. Assign the following Roles:
Azure Stack HCI Administrator
Reader
These will allow you to manage the HCI systems deployed within the subscription. Verify the Role Assignments are correct before moving on.
Finally, we need to assign the required permissions to deploy the Azure Stack HCI resources. The best way to do that is to pre-create a Resource Group within the subscription. You “could” do this subscription wide, but that’s not a best practice and unless you are going to be creating 100s of clusters across dozens of RGs, it doesn’t really make sense. Even then, I’m not sure it does.
Once you’ve completed assigning the RPs and your Subscription level IAM roles, scroll down to Resource Groups and create a new Resource Group. Call it whatever you like. Wait for this to complete then select the RG.
Inside the RG, you’ll go to the IAM section on the left-hand side of the blade and on the right select “Add+” like before then Add Role Assignment. You’ll want to give yourself the following roles:
Azure Connected Machine Onboarding
Azure Connected Machine Resource Manager
Key Vault Administrator
Key Vault Contributor
Key Vault Secrets User
Storage Account Contributor
There are programmatic and additional organizational methods to make these rights assignments work at scale. You could use Azure CLI or PowerShell or Cloud Shell to perform all of this. You can also create EntraID groups to organize the assignments or even create a Service Principal to manage all of the onboarding and limit rights assignments to only those who NEED to Manage or Troubleshoot all this. All of that can, and should be done if you’re going to scale this solution, but for a limited environment with very little infra, is that worth it? If so, you can have a look here:
You can use the user rights above and the role assignments with those links to construct a scalable Cloud Identity and Onboarding solution.
At this point, we’ve completed the Identity portion of the solution, and we can begin to install the HCI Nodes. Thanks to Flo Fox and Michael Godfrey for all the documentation and scripts. Oh, and thanks to Kevin Sullivan for letting me use his catch phrase. Thanks for reading!
]]>Lee CoxRoll your own AVD on HCI deployment – Part 1: The Gear2024-03-27T09:34:22-05:002024-03-27T09:34:22-05:00https://leecox.pro/gbbcore/roll-your-own-avd-on-hci-deployment-part-1-the-gearLee Cox – Advanced Migration GBB
We often need to try things ourselves. While vendors can provide a test environment or POC gear, it can be faster to make your own setup and bang against it. Working with an OEM or Solution Provider can sometimes be slow, require a business justification that might not be immediately forthcoming or budget, especially in this day and age, that is non-existent. But you’ve got gear and your crafty. 🙂
Please read this in its entirety before taking any action. My stream of consciousness writing style isn’t for the faint of heart.
Microsoft provides a bunch of ways to try Azure Stack HCI. The most readily available is HCIBox directly linked in the portal to get you a fully up and running environment with very minimal work. The challenge though is it runs on Azure and Azure running a big VM isn’t exactly cheap. Especially if you’re using US East/West 24/7. So, with these things in mind, I thought I’d work on a set of blog posts that will help you take gear you might already have and run a test/demo cluster to try out a bunch of interesting and exciting things Microsoft has been working on lately. Please consider this a loose guide vs a strict to-do list. Your mileage may vary, and I’ll provide a bit of my own experiences and tips along the way. I’ll try to clear the path as much as I can to make it a straightforward exercise. Yes, this is what it looks like when a Microsoft employee goes rouge-ish. There are very good reasons you shouldn’t do what I’m about to explain. Case in point:
*** General Disclaimer***
You know this isn’t going to be supported right? Like, you’re using old potentially out of warranty gear in the hopes to emulate a supported and new solution. Yeah, well just to make sure it’s said, You’re on your own. Don’t go complaining to the OEM or Microsoft should the server(s) burst into flames and burn down your House or Datacenter. We warned you. If you turn in a support request in the Azure portal, you will be, politely, told to pound sand.
So, you’ve got some obsolete off lease/decomm’ed gear laying around and you want to give Azure Stack HCI a try. Awesome! Maybe it’s some old Haswell or Broadwell spec gear. Maybe it’s a newer workstation, or a KabyLake Intel NUC. Most anything will do in this type of scenario. It’s just Windows after all. One thing of note though is that Azure Stack HCI 23H2 isn’t strictly Windows. Azure Stack HCI comes out of the Azure Windows development branch and as such it’s HCL IS slightly different. It’s one of the many reasons Microsoft works with our OEMs to publish Validated Nodes, Integrated Systems, and Premium Solutions.
Pay particular attention to the Storage, Networking and CPU requirements. Also ensure that you have a TPM (2.0) and can use Secure Boot. You can run all of this on a single node, but the more you put on one system the slower it will run. Have a look at the HCIBox requirements for an idea of the resources needed. If it’s Single Node, you should use an all NVME/FLASH storage environment. If you do 2+ nodes, 10Gb RDMA networking is needed between the nodes for Storage Spaces Direct minimum. If you have more than one node. They all need to match from a hardware config perspective.
Another special note: Don’t leave Fiber Channel cards in the server. It’s bad. HCI is a Hyper Converged Infrastructure solution. It doesn’t use them and doesn’t support them. One of the other ways it differs from Windows Server, no SAN disks! And since I mentioned disks, have some. OS Disk (No USB Keys/SD Cards or trying to run Azure Stack HCI on WindowsToGo), and Data Disks. Also ensure that your storage controller isn’t hiding your disks. It needs to be set to “IT” mode. Get IT?? 😀
So, if it isn’t strictly Windows what does that mean? Well, for starters you might have problems booting the ISO Image. I have colleagues who’ve tried to set this up at home and they end up with BSOD because things that worked in Azure Stack HCI 22H2 aren’t working in 23H2. A lot was done in the branch to pare down older system support including removing inbox chipset and storage drivers that have been there since the beginning of time.
What can I do about that, you say? Well, I’ll tell you how I get around these types of issues. I install Windows! At least, to begin with. The current Windows Server 2022 release is always a good base to begin with to get up and running and chasing down driver support: drive controllers, nics, OOB Controllers, etc.
I know what you’re thinking. “I’ve come here to learn how to setup Azure Stack HCI and this numskull is sending me on a wild goose chase!” Well, yes of sorts. (I prefer snipe hunts myself.) Installing the latest version of Windows does a couple of things for us.
It gives us a known good OS (with a GUI!) that should work and validates the hardware is stable and able to run something “quirkier”.
It allows us to gather and validate all the firmware and drivers we need to move the hardware to a good current config.
A lot of times, when dealing with decomm’ed or older hardware it may not have been current when it was powered off or at least now that you’re powering it back on. We need to check it. The best way to check it is to start clean. Get rid of Linux, ESXi, or older versions of Windows and see what needs to be remediated. An hour on the front end of this adventure will save many more troubleshooting issues trying to get things running later. If the system has an out of band system controller like an iLo, DRAC, XClarity, etc… those often keep system component and firmware information you can reference to start.
After installing Windows Server 2022 (GUI!) onto the system, boot into Windows and do the usual things. Give it a Password, set an IP that can access the Internet, and take inventory of the Device Manager driver situation on the machine. Go to the Manufacturers website under the support section, and search for relevant drivers for the last version of Windows supported on the hardware. Whether that’s WS2016, Windows 10 etc.. the newer the better. That’s a good driver baseline and a check against the age of the machine. If it doesn’t support either of those OSes, find something newer…
Key Firmware, Software, and Drivers to collect:
CPU and Chipset Drivers
Storage Controller Drivers
NIC Drivers
Out of Band Management OS Interface Drivers
Latest/Last versions of System Firmware
OOB, NIC, Storage Firmware
Be really detailed here and check for any add-in cards within the system, collect those Firmware/Drivers also. The steps here are similar to the work OEMs do for you with the base image of Azure Stack HCI you’d receive pre-installed. There is often a recipe or Firmware/Driver Bundle published for the specific system that supports Azure Stack HCI. You’re building that bundle here.
Once you’ve started collecting all that, create a folder on the system and dump the firmware and drivers/software in separate sub-folders. Unpack/Extract as much as you can so that you have *.inf and *.sys files for the drivers. It will help later.
Sample Folder Structure and Components
Sample Unpacked Drivers
Run through the drivers first, then the firmware to get the system up to date. Reboot and then run through Windows Updates to see if it finds newer/better versions of anything. Reboot again. Run update again… you know the drill.
Once you’re to a steady state, this system should be as good as it can be. You should validate that you can turn on and use 2 things before moving on. First, the system TPM NEEDS to be 2.0, it’s called out in the Requirements above. If it’s 1.2 check and see if the TPM can be swapped out.
Special Note: Some OEMs say that the TPM, which is a removable card, is now integrated into the mainboard and can’t be swapped. That isn’t strictly true. Some can be removed (sometimes easily, other times with pliers) and swapped with the 2.0 TPM option. *cough* HP Gen9 Servers *cough*
Verify the TPM can be enabled, in Windows Server Admin PowerShell run:
Get-TPM
If you see a bunch of “True” on the output. You’re good. If it’s false, the TPM isn’t correctly configured in the BIOS/UEFI.
Next verify the SecureBoot option is enabled and functional. In Windows Server Admin PowerShell run:
Get-SecureBootPolicy
You should see a GUID and version number if it’s properly enabled.
Check your BIOS/UEFI for both options. You might need to reset the system to factory defaults to properly clear old configs especially if you replace components, add new ones, or swap out the TPM.
Once you’ve got everything ship shape, it’s time to collect your work. Using the Windows Server 2022 USB Drive you created in the beginning, collect all the driver and firmware files from the system. Put it in a folder named something relevant to the system you’re working on. If there are multiple nodes, replay this work on all the other nodes to get them healthy and on the same firmware, and UEFI config to move on from here. Yes, install Windows, install the drivers and firmware.
The next thing to do is pull down Azure Stack HCI. At this point we need an Azure Subscription, you’ll have to have one later so, if you don’t have one. Go get one now. You can sign-up for Visual Studio Dev Essentials which comes with Free Azure Credits. Here: Visual Studio Dev Essentials – Visual Studio (microsoft.com)
Once on the landing page, in Search type: Azure Stack HCI
Select Azure Stack HCI to go to that landing page.
On that page go to “Step 2” and click to download the latest ISO.
Once you’ve pulled down the ISO, now we’re going to build a new Azure Stack HCI USB install key. This can be the same as the Windows Server USB Key we started with, but we need to get the Driver/Firmware folder off the drive FIRST!
One way to smooth out the install process and make the drivers self-loaded, is to Slipstream the Azure Stack HCI ISO with the driver packages you’ve collected. To do this, Thomas Maurer has a great guide to help add those drivers programmatically. Go here: Add Drivers to a Windows Server 2019 ISO Image – Thomas Maurer
Build out the directory structure he outlines and mount the HCI Image on your machine. You’ll substitute Windows Server 2019 with Azure Stack HCI 23H2, but still add the drivers to BOTH the Install.wim and Boot.wim before continuing. Once you have the drivers integrated, copy the contents of the ISO folder over to the USB Key. Then also copy over the Driver/Software/Firmware folder onto the USB Key. You shouldn’t need it, but if there is software or drivers that aren’t unpacked or don’t slipstream you can quickly add those to get things done. As an example, the HPE iLo CHIF driver doesn’t integrate well. Nor does the config tools for the storage controller and iLo.
The main reason to slipstream is to add hardware specific boot drivers that might be missing in the base image especially those required during install and device detection.
We’ll stop here as next step is the Planning and Identity Prep pieces. I want to take a minute and thank Thomas Maurer for the documentation links. His site is invaluable. Thanks for reading!